Pages

.

Sticky Toffee Dates & Flaxseed Cake

Sticky Toffee Dates and Flaxseed Cake,quite long name,isn'it ?  Well, this is not any new recipe to you.  It's been recreated from traditional Sticky Toffee pudding.  In Sticky toffee pudding, the sauce plays the major role, warm pudding with the toffee sauce is,  Oh my!  I'm into the dream of Sticky Toffee  Pudding.

Today I was not really in a mood for something sweet, so I skipped the sauce.  The next change which I made is, since I was planning to pack this for my daughter's snack box,  I have replaced plain flour with whole wheat atta.  Finally I have added some flax seed.
In case you are new to this term flaxseed, you can read about flaxseed here, here and here.

Flax seed is rich in fibre and Omega 3, which lowers your cholesterol and keeps your heart healthy.  It also fights against diabetes and there are so many other goodness in flax seed.  Read about it in the link given above.


Preparation Time: 10 minutes
Cooking Time: 20  minutes
Makes about 6 muffins

Ingredients:
Whole Wheat Atta/ Plain flour- 160 g
Brown Sugar- 60 g
Pitted Dates- 150 g
Butter- 5 tbsp
Flax seed- 1 tbsp ( powdered )
Eggs- 2
Baking powder- 1 1/2 tsp
Bicarbonate of soda- 1/4 tsp
Vanilla essence- 1 tsp

Method:
Boil some water, add the bicarbonate of soda and pour the boiling water on top of the dates until it looks well immersed.  Cover it and let it rest for a whole night and for about 3 to 4 hours.
Beat the butter and sugar in a food processor until it looks creamy.  Add the eggs one by one and continue beating it, add the soaked dates along with water and keep beating it.  Add the sifted flour, flax seed powder, baking powder and vanilla essence, continue beating it until it looks well combined.
Preheat the oven to 190 degree Celsius.  Divide the mixture equally between greased and lined muffin tray.  I used a silicone mat, so I didn't have to line it.  Bake it in the preheated oven for 25 to 30 minutes or until a skewer inserted comes out clean.  Remove it from the oven, let it cool in the wire rack for 5 minutes and serve it warm.


Note:
If you don't have muffin tray, you can also use normal round or square pan.  Instead of whole wheat atta, you can also use plain flour.  Flax seed can also be omitted if you couldn't get them.
reade more... Résuméabuiyad

Any One Can Cook: Series 40

Hello Foodies,

Hope you all had a nice weekend.  This is our successful 40th series.  Thank you everyone for linking your recipes with Any One Can Cook, hope will continue to have the same support in the oncoming series too.  If you are new reader to this blog, read more about the event here.
Here are the three selected recipes from last week series
Nutella Mug Cake by Shami's Delicacies

Beetroot Soup by Aromatic Kitchen

Banana Peach Smoothie by Mahaslovely Home

Selected recipes for the month of January
Nutella Mug Cake

Dry Shrimp Chutney

Chatpata Kela
If you would like to get featured in this event, link you recipes to the event in the below link.  If you find any trouble in linking your recipes, send me your recipe link to ayeesha.riaz@googlemail.com.


reade more... Résuméabuiyad

Basic Scones for Daring Baker's January 2012

It might be Basic Scones but I have to say this is the best of all scones.  This month we were challenged to make Scones by Audax from Audax Artifex.  I have never fancied scones so much but this one is a big Wow!  The reason behind this successful and fluffy scones is AudaxAudax has explained the every single fact about this scone, which resulted in this beautiful scones.

 
There so many variations in this scones, Cream Scones, Buttermilk Scones, Fruit Scones and so many.  I highly recommend to try this Basic Scones first.  These Basic Scones are perfect when filled with some jam and clotted cream. I regret that I made a very small batch, my next try will be with wholemeal and some fresh fruits probably.   Thank you Audax for this great recipe and valuable tips, this is definitely a keeper.


Preparation Time: 10-15 minutes
Cooking Time: 10- 15 minutes
Makes 5 Scones

Ingredients:
All purpose flour- 240 g
Cold Butter- 2 tbsp
Milk- 120 ml
Baking Powder- 2 tsp
Salt a pinch

Method:
Triple sift the flour in a large bowl and mix it along with salt and baking powder.  Grate the cold butter and freeze it for about 30 minutes.  Rub the butter into the flour gently.  Add the milk and mix it into a dough using a spatula.  The dough will be quite sticky, wetter the dough lighter the scones.
Do not over work or under work the dough, both will spoil the texture.  Once the dough comes together, you can pat it gently with your fingers and cut it into scones.  If you are looking for layers, fold the dough once or twice.  Pat it gently with your fingers, dip a round cutter in a flour and cut it into rounds.
Preheat the oven to 240 degree Celsius.  Place the scones in a preheated oven for about 10 minutes, until it looks raised and lightly brown on top.  If you want a shiny top on the scones, you can glaze it with milk before baking.  Take it out from the oven, leave it to cool in a wire rack.  Serve warm scones witha dollop of Jam and fresh cream.
reade more... Résuméabuiyad

Pav Bhaji - Indian Street Food

It's been a very long time since I posted two recipes in one post.  If I think about that it's quite breathtaking for me now.  I made up my mind to post this as quick as possible, so let's have a few words about the recipe and then hit straight to the recipe.  Pav Bhaji is a well known to be as  Indian street food.  In Marathi Pav means a small  loaf of bread and bhaji means vegetable dish, you can also read some interesting history and origin of this recipe from here.


Today in this recipe , the bread recipe which I have given is not pav buns, it's Buchty.  Buchty is popular in Poland and Germany, which is normally served for breakfast.  These buns are very similar to pav buns, except that the top layer is bit crusty.  These buns also goes very well with bhaji.  This unique dish can be served as a snack or a meal by itself.

Buchty

Preparation Time: 10- 15 minutes + rising time
Cooking Time: 25 minutes
Makes about 16 rolls

Ingredients:
All purpose flour-  450g
Sugar- 50 g
Butter- 2 tbsp
Eggs- 2
Milk- 120 ml
Yeast- 2 tsp
Salt- 1 tsp 

Egg wash:
Egg yolk- 1
Milk- 1 tbsp

Method:
Sift the flour in a large bowl.  Mix the salt, sugar and yeast along with the flour.  Heat the milk and butter until butter gets melted.  Make a well in the center of the flour mixture, add the eggs and slowly add the warm milk mixture, beat with a electric beater.  Once the dough comes together, knead the dough in a floured work surface for about 5 to 10 minutes.  Place the dough in a clean and oiled bowl, cover with a cling film.  Let the dough rest in a warm place for about 1 to 2 hours or until doubled in size.
Preheat the oven to 190 degree Celsius.  Take the raised dough, knock the air back.  Divide the dough into 16 equal parts.  Grease a  9 inch square tin.  Place the balls inside the tin, cover loosely with a cling film and let it rest in a warm place for about 30 minutes.  Brush the top of the bread with milk and egg.  Bake it in the preheated oven for 25 to 30 minutes or until the top of the bread looks crusty and golden brown in colour.  Take it out from the oven, remove it from the tin and let it cool in the wire rack.


Pav Bhaji masala:

Preparation Time: 20 minutes
Cooking Time: 20- 30 minutes
Serves 6 to 8

 Ingredients:
Cauliflower- 1 cup ( florets separated )  
Potatoes - 2 to 3 medium sized ( chopped )
Carrot- 2 medium sized ( chopped ) 
Peas- 1 cup
Onion- 1 medium sized ( finely chopped )
Tomatoes- 3 medium sized ( finely chopped )
Capsicum- 1 chopped
Ginger garlic paste- 2 tsp
Green chilly- 2 slit lenghtways
Pav bhaji masala- 3 tsp
Cumin seeds- 1/2 tsp
Coriander leaves- 1 tbsp ( finely chopped )
Butter- 1 tbsp
Salt to taste
Juice of 1/2 a lemon

 Method:
Immerse the cauliflower florets in hot water and wash it thoroughly.  Add cauliflower, potatoes, peas and carrot in a pressure cooker, add little water and pressure cook it for upto 1 whistle.  Mash the vegetables and keep it separately.  In another pan, heat the butter until it gets melted, add the cumin seeds, ginger garlic paste and onion, saute until the onion looks transparent in colour.  Now add the tomatoes and mix it well.  Cover the pan and cook until the tomatoes get mashed well.  Add some water to it ad let it boil for few minutes until it looks saucy.  Now add the capsicum and boiled vegetables.  Then add the pav bhaji masala, green chilly and salt.  Cover it and let it cook for few minutes, until the oil floats on top.  Finally add chopped coriander leaves and juice of 1/2 a lemon.


To Serve:
Slit a bun into half, toast with butter on both sides, spoon some gravy on the inner side of the bun, sprinkle some raw chopped onion and coriander leaves on top, serve with some lemon wedges on side, to squeeze the juice just before serving.

Note:
Don't miss the raw onion, coriander leaves and squeeze of lemon juice,it not only adds up a special flavour, it's also very good for your health.  Raw onion build immunity and coriander leaves is good for digestion, stops bad breath, keeps your lips healthy.


This recipe goes to Yeastspotting, Street Foods, New U, Healing Foods- Cauliflower hosted by Zesty Palette originally created by SiriBake Fest hosted by The Pumpkin Farm originally created by Vardhini.


reade more... Résuméabuiyad

Any One Can Cook: Series 39

Hello Foodies,

Here is our 39th series of Any One Can Cook.  My big thanks and hugs to everyone who links your recipes for this event and making it a grand success.  Myself I learn a lots of new recipes through this event, so thank you everyone, looking forward to the same support in the oncoming weeks also.  Our three selected recipes from Series 38
ChatPata Kela from Preethi's Kitchen Life

Carrot Kosambri from Vegetarian Food and Me

Garlic Rice from Mahas Lovely Home
If you are a new reader to this blog,  you can read the rules about this event here.  If you would like to get featured in this event, all you have to do is to link your recipes in the below link.  If you find any trouble in linking your recipe, mail me your recipe link to ayeesha.riaz@googlemail.com.

reade more... Résuméabuiyad

Nellikai Sadham / Gooseberry Rice

Nellikai is the Tamil name for Amla / Gooseberry.  Amla is generally known to strengthen hair roots and for hair colouring.  Apart from that Amla has numerous nutritional values. Amla is rich in Vitamin C compared to oranges. Amla is also known to control diabetes when consumed regularly.  Read more about Amla from a few source here and here.


I have to say that this recipe is a mere replica of Lemon rice, I have followed the same recipe for lemon rice except that lemon juice is been replaced with Amla juice.  Just like lemon rice, this Amla rice also pairs well with potato fry, but in my family mutton sukka or varuval is our favourite combine which perfectly pairs with Amla rice.


Preparation Time: 10 minutes
Cooking Time: 5- 10 minutes
Serves 4

Ingredients:
Cooked Rice- 2 cups
Amla- 8- 10 ( extract the juice out of it )
Turmeric powder- 1/2 tsp
Methi powder- 1/4 tsp
Salt to taste

Seasoning:
Mustard seeds and Urad dhal- 1 tsp
Fenugreek seeds- 1/4 tsp
Dried red chillies- 3
Kurry leaves- 7 to 8 leaves
Chana dhal- 1 tsp
Peanuts- 1 tbsp
Oil- 1/2 tbsp

Method:

Wash the Amla well, blend it well in a blender by adding very little water.  Filter the juices only.  Mix the juice with turmeric powder, methi powder and salt.
Heat oil in a kadai, add mustard seeds and urad dhal, when the seeds start spluttering, add fenugreek, chana dhal, peanuts and the remaining ingredients one by one.  Fry it in low flame until the peanuts looks fried and the colour changes.  Finally add the Amla juice and let it boil for a minute, now add the cooked rice and mix well to coat all the rice with the mixture.  Take it off from flame and serve warm with Mutton sukka and poppadoms.

Sending this recipe to New U, Cooking Challenge- Flavours Of Tamilnadu , Let's Cook - Rice , Let's Cook With Leftovers , Cooking With Left Over- Kitchen Chronicles hosted by Veg Junction originally created by Kalyani, 


reade more... Résuméabuiyad

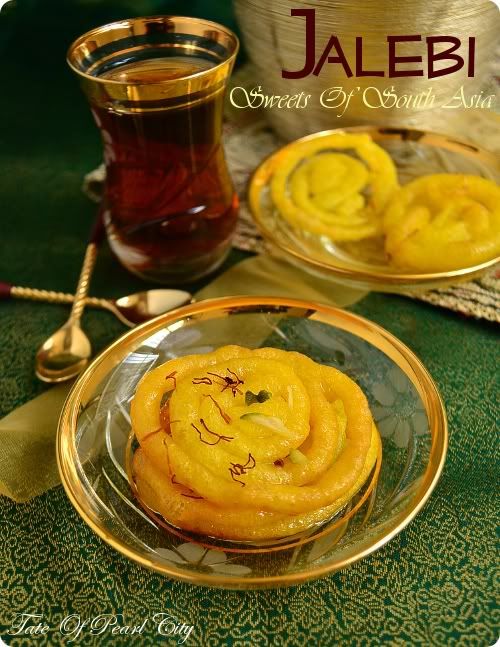
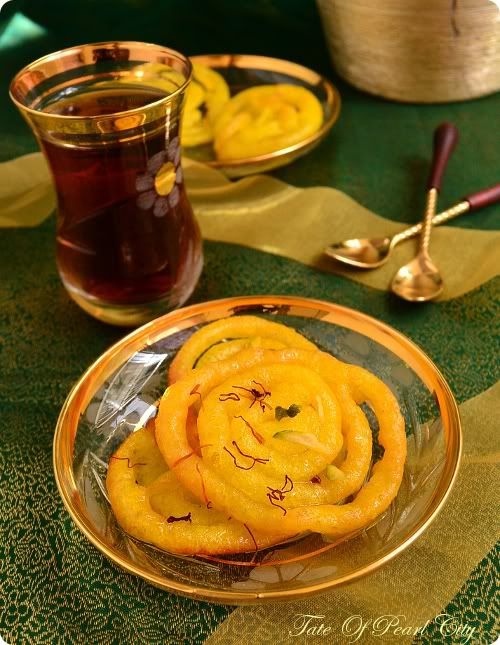
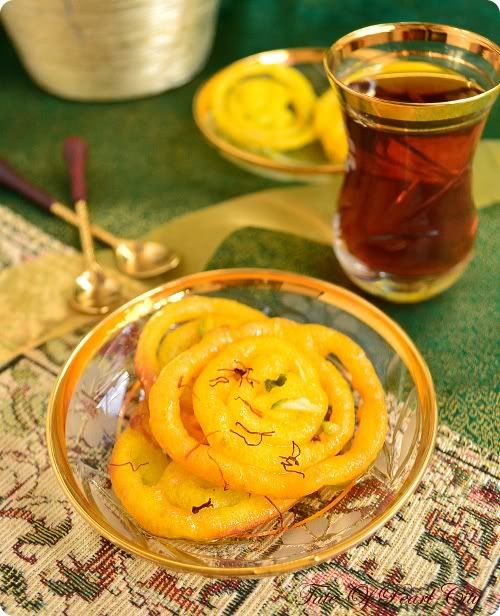
Jalebi

There is nothing to beat the combination of warm Jalebi's and Hot samosa chat, why I'm so strong about this combo is, It has lots of memories to bring back for me.  I can still remember those care free days in my college life, when me and my friend used to enjoy this treat almost every other day.  We had a chat shop very close to our campus which offered these amazing jalebi's and chat at a very reasonable price so that students were able to afford for that very easily.  Probably that's one of the best jalebi's I ever had.  After that jalebi experience again the good one was in UK during Ramadhan.

In places like Southall ( guess I spelled it right ) , In the month of Ramadhan during Iftar, you can see lots and lots of Pakistani and Indian shops who have piles of fresh jaelibi's, which are just amazing too.  So jalebi's are always special to me.

  These special Jalebi's which is well know in Asia, is been originated from Iran.  Infact I have also seen a few Turkish and Arab sweet which is almost similar to Jalebi preparation except the shape is like churros.  Anyway the concept is same here, yeasted batter deep fried and then soaked in sugar.  I love this innovation by man.

So there are tons of recipes for Jalebi's available online, some suggest without yeast, natural fermentation method and some with yeast.  To me natural fermentation is bit challenging sometimes, so I went for the yeasted one.  I have adapted the recipe from Manjula's Kitchen, so click here to watch and read the recipe.  She has some amazing collection, here recipes can be trusted always, also she gives us a clear view about the recipe, do check out her site definitely.

A few tips for Jalebi's on my view:
Once the batter gets fermented, it might go a bit runny, in that case add very little amount of cornflour to thicken the batter.  Also if your yeast didn't work, add a pinch of bicarbonate of soda to the batter.  You can also tint the Jalebi's with orange or yellow colour by adding a few drops of food colouring to the batter.
Don't get disappointed if your Jalebi's shape are not good, practise will make you perfect.  Also one tip to get a good shape is, keep the flame in low and then pipe it in oil.
reade more... Résuméabuiyad

Any One Can Cook: Series 38

Hello Foodies,

Hope you all had a wonderful weekend.  Thank you everyone for submitting your wonderful entries for the last week event, looking forward to more entries in the oncoming weeks.  Here is our three recipes from last wee series
Ice cream by Shami's

Orange Kheer by Preeti's Kitchen

Lemon rice by  Simple Woman  Simple Life

If you are a new reader to this blog,  you can read the rules about this event here.  If you would like to get featured in this event, all you have to do is to link your recipes in the below link.  If you find any trouble in linking your recipe, mail me your recipe link to ayeesha.riaz@googlemail.com.


reade more... Résuméabuiyad

Banofee pie in a glass for Sweet Punch January 2012

To start this new year with a Sweet Punch, our team has selected Banofee Pie from Swapna's Cuisine. Banofee Pie is a traditional English dessert, made with pastry or crumbled biscuit base, topped with toffee, bananas and cream, layers and  layers of yumminess.  The layer which I loved the most in this dessert is toffee or  dulce de leche, I would even love to dulce de leche just as a dessert on it's own, straight from the can, well who  wouldn't  ; )


 I have made  a very few changes to this recipe, instead of serving it in a pie form, I served it in glasses.  A large portion of pie would be too much for two of us.  The other change is , unfortunately the cream was out of stock when I went for shopping, so I ended up making pastry cream, which tasted still good.  For  pastry cream recipe, please refer here.  Also one good thing about serving it in a glass is it doesn't require any setting time, it can be served immediately once made.  Thank you Swapna for giving us this yummy dessert.

Serves 2
Preparation Time: 20- 25 minutes

Ingredients:
Digestive biscuits-  5
Cocoa powder- 2 tsp
Butter- 1/2 tbsp
Condensed milk- 1 can
Banana- 1 sliced and mixed with a tsp pf lemon juice ( to avoid discolouration )
Pastry cream- 2 tbsp
Extra cocoa powder to dust it on top

Method:
Place the condensed milk in a large pan of water, the can should be completely immersed in water.  Once the water starts boiling, reduce the heat and let it simmer for two hours.  In the middle check the water level, if it's reduced fill it to immerse the can completely.  Remove the can from water bath and let it cool down.  Once cooled down, when you open the can, you have the irresistible dulce de leche which can be used for the recipe.
Place the biscuits inside a freezer bag and mash it with a masher or rolling pin until it looks coarse crumbs. Mix the mashed biscuits and cocoa powder in a bowl, melt the butter and pour it on top of the biscuits and mix it well.  Take two serving glasses, divide the biscuits equally between two glasses.  Top it up with slices of banana, then dulce de leche and finally cream.  Dust it  on top with cocoa powder and serve.

Sending this recipe to ABC series: Desserts ,Cooking Concepts: Chocolate FestCook, Eat, Delicious Dessert hosted by Veggie Platter created by Raven , Chocolate Mela, Banana recipes , Chocolate LoverLove lock with sweets hosted by Killer on the plate created by Vidhya of Sweet Karam and Kaapi


reade more... Résuméabuiyad