Pages

.

Pumpkin Parathas with Garlic Butter

 We all know how Suhaina's Garlic rolls has won the heart of lots of all bloggers, whoever tries it for the first time will definitely fall in love with it.  The aroma released from the garlicky butter while baking is simply irresistible.  Baking home made breads and working with yeast has become something very normal and usual in these days, thanks to bloggers, cookbooks and TV shows.
  Still if you are a learner or beginner in cooking and you are not so familiar in using yeast, yet you are tempted to make garlic butter, then this is the recipe for you.  I'm not comparing these with garlic roll, since that's the best, but still this can satisfy your  garlic rolls craving in the form of soft parathas.  In normal parathas you apply plain butter or oil in the middle of the dough, in this we have replaced the plain butter with this aromatic garlic butter.  Hope enjoy making this at home.

Makes 18 to 20 parathas
Preparation Time: 20 minutes
Cooking Time: 20 minutes

Ingredients:
Wheat flour- 2 cups
Pumpkin puree- 1/2 cup
Salt- 1/2 tsp
Oil- 2 tsp
Water just enough to make a smooth dough

For the filling: ( Mix together all the ingredients to make the filling )
Butter- 2 tbsp ( at room temperature )
Grated garlic- 3 tsp
Dried Italian Herbs- 1 tsp
Salt to taste

Note:
Dried Italian herbs can also be replaced with finely chopped fresh coriander and mint leaves.

Method:
 Mix together flour and salt in a large bowl.  Make a well in the middle, add oil, pumpkin puree and enough water to make a smooth dough.  Cover the dough with a cling film and let it rest for 30 minutes.  Divide the dough into 18 to 20 equal rounds.  Flatten the dough slightly, apply garlic butter in the middle.  Cover the dough and make it into a round again.  Flatten the dough into 8 to 10 cm diameter.  Repeat the same process with the remaining dough.  Heat a tawa, place one paratha in the middle, when you see small bubble on top, turn it other side, apple little oil or ghee.  After a minute turn it to other side, apple some more ghee.  Remove it from the tawa and serve it immediately.  Serve the parathas warm with some spicy curries.  These parathas are at it's best while they are still warm.

To make pumpkin puree:
Peel and chop the pumpkin.  Stem it in a steamer for about 10 minutes, puree it in a blender without adding any water.


reade more... Résuméabuiyad

Rava Peas Tikki

Just like all mums, I too have the same worries every day night before going to bed, what lunch / snack I'm going to pack for kid.  As a mum our responsibility doesn't end  just  by packing the food, it's also our responsibility to make sure that he / she likes it and enjoys the food.

Each and every kid is unique and they have different taste buds, only a mum will know what her child needs.  So here is a simple dish which I adapted from Tarldala's Cookbook ( Cooking for kids ).  It's a very simple, nutritious and very easy to make i.e. , you can pack it very easily for your kids even on a busy weekday morning.  According to your kids taste you can vary few flavours or the vegetables like instead of peas, you can also add corn, carrot or even broccoli.


Preparation Time : 10 minutes
Cooking Time : 15 minutes

Ingredients:
For the Outer Layer:
Rava / Semolina - 1/2 cup
Water- 1 cup
Turmeric powder- 1/2 tsp
Oil- 1 tsp
Salt- 1/4 tsp

For the filling: ( Mix all the filling ingredients together )
Boiled and crushed peas- 1/2 cup
Chaat masala- 1 tsp
Salt to taste
Oil  for frying

Method:
Prepare the outer layer :
Heat the water along with the salt in a pan.  When water starts boiling add the rava little by little and keep stirring continuously.  Add turmeric and stir until it comes together like a dough.  Take it off from heat, add about a teaspoon of oil.  Cover it and leave the dough for about 5 minutes.
Divide the dough in to 8 equal rounds and divide the filling into 8 equal rounds. Apply oil to your hand and  flatten the dough in the middle of your palms. Place the filling in the middle and cover it without any cracks and flatten it again slightly.  Heat the oil in a pan and fry the tikki's in medium heat until they look light brown in colour.  Serve it warm with tomato ketchup .  To pack in a lunch box, let it cool down for a while, wrap it in aluminium foil and pack tightly in a lunch box.

Sending this to Cooking With Seeds- Peas, Snacks Mela, Kid's Delight- Colour Palette hosted by Veg junction originally started by Srivalli
 
reade more... Résuméabuiyad

Paal Paniyaram for Bonjour

This post is exclusively for bonjour series by Jabeen's Corner.  By this time most of us should be familiar with Jabeen's Bonjour series.  I feel very happy to be part of this great series.

When Jabeen asked me to make my signature dish, the first thing which came to my mind was Chocolate Fudge Cake, this cake has never let me down, but the next thing again which came to my mind was I have to buy cream, also my little one ho loves this cake is not well at the moment.  I really didn't want to make it when she can't have this, so I asked my husband to give me suggestion, well he suggested this paal paniyaram.  I have made this only a very few times and every time it's a big hit.

Paal paniyaram is a traditional Chettinad recipe.  Chettinad Cuisine is well known for their spicy, aromatic flavours.  It is also known for this special recipes like paniyaram, idiyappam, murukku etc.  Traditional recipe suggest to use raw rice and urad dhal to make a thick batter, which is then fermented and made as paniyaram.  I have used only idli batter in this recipe, which I found it quite easy method and much more soft paniyarams.  Since idli batter is readily available in most of the South Indian's home I thought this would be better option.  Also these paniyarams gets soaked quickly and you don't have to put them in hot water before soaking in milk.  This has won the heart of my family members, hope it'll win yours too.

Ingredients:
Idli batter- 250 ml ( recipe follows )
Milk- 500 ml
Coconut milk- 250 ml
Cardamom powder- 1/2 tsp
Sugar- 75 g
Oil for frying

Method:
Heat the oil in a kadai for deep frying.  Drop small spoonful of idli batter in the hot oil.  Fry them until they look very light brown in colour.  Take it out from the oil and drain it in kitchen towel.  Heat the milk in a pan  for about 5 to 10 minutes.  Add the sugar and stir well.  Finally add the coconut milk and cardamom powder and take it off from heat. Add the paniyaram in the hot milk, let it soak for about 10 minutes and serve it immediately.

Note:
You can vary amount of sugar according to your taste.  Also if your batter is too thin, you can add some rice flour and mix well.  Make sure you don't add too much rice flour which will harden the  paniyaram and it never gets soaked well.
In case if you find that your dumplings are too hard, you can immerse them in hot water for 5 minutes and then soak it in milk. 

Idli Batter:

Parboiled rice-  3 cups
Urad dhal- 1 cup

Soak urad dhal and rice separately.  Grind them separately to a smooth batter.  Then combine both the batter, mix it along with salt and let it ferment over night.  Once fermented use it according to the recipe.
This proportion will yield about 3 to 4 litres of batter.

Linking this to White Christmas ChallengeYummy Desserts for New year, Sinful delights, Jingle All The Way- Edible entertainment, SYF and HWS series- Cardamom
 

reade more... Résuméabuiyad

Bibingka or Rice flour Cake For Sweet Punch December 2011

Bibingka is a Filipino dessert which is baked with glutinous rice, rice flour, cheese and salted eggs.  Actually I was supposed to make this for Daring Baker's last month, which I skipped it since I couldn't find glutinous rice, next I found it quite peculiar using whole salted eggs for dessert.

We use eggs almost for most of our puddings and mousse, which is normally whipped up and get blended but this one is baked with whole salted eggs in the middle.  After skipping the process of using salted eggs and glutinous rice, I found this cake  as a very familiar taste to me, it was very much like a rice flour paniyaram which my mom used to make, except that this is been baked.  Anyways I loved this cake a lot, a best option for gluten free cake, so this recipe is my submission for Sweet Punch.  Oh! Yes, I forget to say, this month Sweet punch team has left to our choice to bake anything of our choice.  Hope you enjoy baking this cake in your home.


Preparation Time: 10 minutes
Cooking Time:  30 minutes
Makes 4

Ingredients:
Rice flour-  150 g
Eggs- 2
Sugar- 75 g
Coconut milk- 60 ml
Butter- 3 tbsp ( melted )
Baking powder- 2 tsp
Cardamom powder- 1 tsp
Fresh grated coconut- 2 tbsp

Method:
Preheat the oven to 180 degree Celsius.  Mix together rice flour, baking powder and sugar in a large bowl.  Beat in the eggs, cardamom powder and  coconut milk into the rice flour mixture.  Finally add the melted butter into the rice flour mixture.  Grease and line four ramekins.  Pour the mixture equally into the ramekins and  sprinkle the grated coconut on top of it.  Bake it in the preheated oven  for 30 to 40 minutes or until skewer inserted comes out clean.  Take it out from the oven, cool it in the wire rack for about 5 minutes.  Remove it from the ramekins and serve it while they are still warm.
Sending this to Cook, Eat Delicious Dessert- Coconut hosted by Raksha's Kitchen originally started by Raven  , Let's Cook- Baked Goodies, Cooking Concepts- Holiday Baking, A 100 Day Global Food Festival, SYF and HWS Series- CardamomJingle All The WayChristmas Delicacy, Sinful Delights and Bake Fest 


reade more... Résuméabuiyad

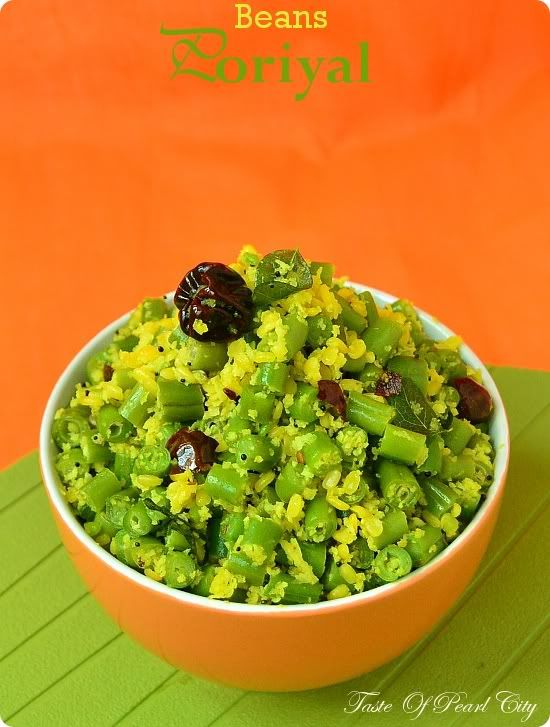
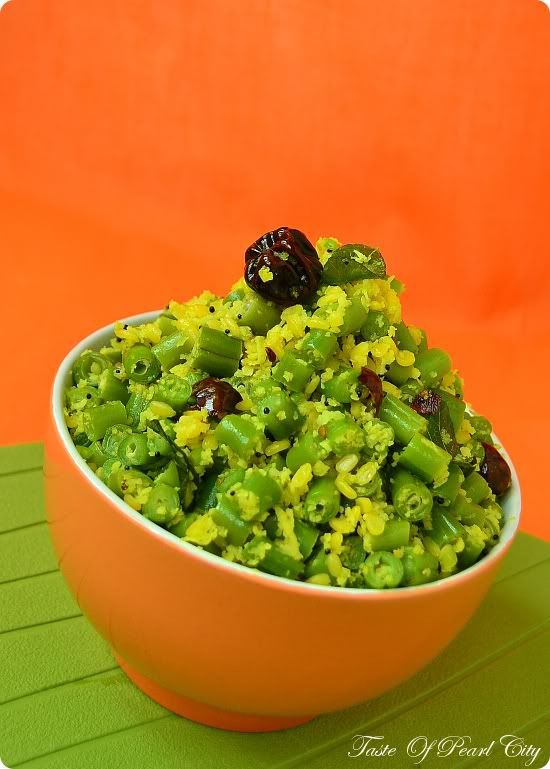
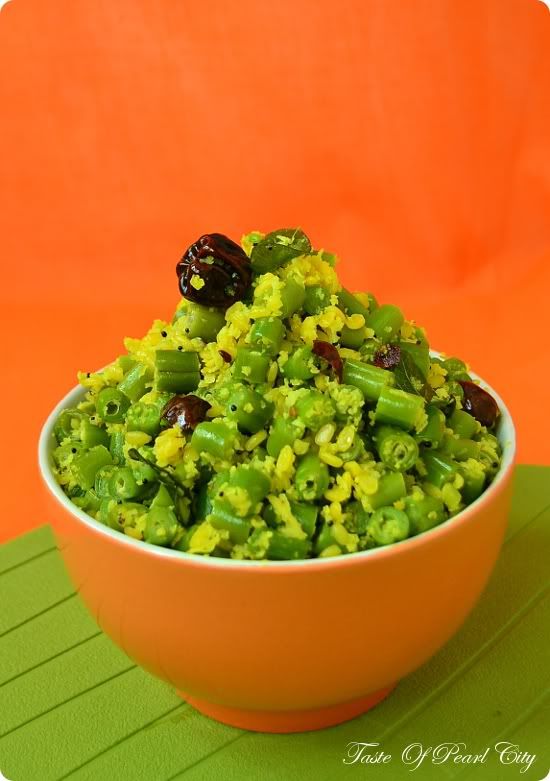
Beans Poriyal


This time I'm not going to say, I'm back after a long time, held up with this or that and so on.  Since this has become my usual routine these days.  Anyways today I have come up with a very simple version of poriyal.
  In my earlier days of cooking, I consider even this poriyal as something special, for me poriyal used to be very simple stir fry, with only vegetables, salt and turmeric powder.  Poriyal has to meet  the purpose of intake of vegetables in your regular diet, that's it for me.  I never cared about adding any extra touch or flavours to it, which was more than enough for me and my husband.

  But when I cook for others, the poriyal has to meet a few criteria, like proper seasoning with dried chillies, curry leaves etc.. also it has have few extra additions like grated coconut, moong dhal etc.  I have seen so many people making so many different version of poriyal, each one is unique and delicious.  Sometimes I even used to think, why we shouldn't have cooking as simple as just steaming , roasting with less spices or without any spices.   Our great great ...  ancestors  lived with those food, they were happy and stayed much healthier as well.  When cooking got complicated with lots of innovative techniques, our taste buds also went complicated, seeking for more flavours, sometimes which may also lead into lots of problem like wastage of food in some star restaurants to meet their high quality or even some minor problems in family with flavours or varieties etc...  No no, please don't lead your thinking that is there any problem with my family, this is just general discussion about what happens around in most of the family.  Okey let's move on to our recipe now.

Preparation time:  10 minutes
Cooking Time:  15- 20 minutes
Serves 2

Ingredients:
Beans- 250 gm
Yellow split moong dhal- 1 tbsp
Fresh grated coconut- 1 tbsp
Onion- 1 small sized ( finely chopped )
Turmeric powder- 1/2 tsp
Coconut oil or sunflower oil- 1/2 tbsp
Salt to taste

Seasoning:
Dried red chilly- 2
Curry leaves- 5 to 6
Mustard seeds- 1/4 tsp
Urad dhal- 1/4 tsp

Method:
Chop the beans finely and steam it in a steamer for 5 minutes.  This will help your beans stay in shape and colour when you are cooking.  Soak the moong dhal for about  30 minutes.  Heat oil in a kadai, add mustard seeds and urad dhal, once the seeds start spluttering, add dried chillies and curry leaves.  Stir for about a minute.  Now add the finely chopped onions ans saute well until it looks transparent.  Now add the grated coconut , moong dhal, turmeric and salt.  Stir it for about two to 3 minutes until coconut gets light brown in colour.  Finally add the beans and stir well.  Cover the kadai with a lid and cook it for further 5 minutes until the beans look cooked well.  Serve it warm with steamed plain rice, rasam and papad.
reade more... Résuméabuiyad