Pages

.

Showing posts with label Chocolate. Show all posts

Single Serving Brownie in a Cup

Just in time for Friday…

This is a perfect dessert for those of us who love dessert, but love it so much that making an entire pan would be a bad idea. 

Why you ask?

Because in two days, the whole 9x13 pan of brownies will be consumed. 
That’s not so bad if you have a family of 6-7, but for a family of 2, well, that’s trouble. 

Since I still love my desserts – my sister and I decided to try a brownie in a cup. 

We decided it was perfect: just the right amount of work that you won’t make it every day, and just the right amount of rich, gooey chocolate to meet your craving. 

Single Serving Brownie in a Cup

Ingredients

  • 2 T white whole wheat flour
  • 1 T sugar (slightly heaping) 
  • 1 T dark chocolate cocoa powder
  • 1/4 tsp. baking powder
  • pinch of salt
  • 2 T water
  • 1 tsp. olive oil
  • splash of vanilla
  • 1 T dark chocolate chips

Directions

Combine the 2 T flour with 1 heaping T sugar, 1 T cocoa powder 1/4 tsp. baking powder and a pinch of salt in a small mug, cup or bowl.  We used a 1 C serving bowl and it fit perfectly. 

Add in 1 1/2 T water, 1 tsp. olive oil and a splash of vanilla.  Stir until well mixed.  Don’t forget the the dark chocolate chips!

Microwave on high for 30 seconds, adding an additional 15-30 seconds if needed.

Top with ice cream and serve.

Use caution when eating – the contents are really hot! 

reade more... Résuméabuiyad

{SF} {Chocolate Review} TCHO’s New TCHOPairings Bars

Things have been a little on overdrive around here. A baby that can crawl and stand, lots of recipe testing, and the holidays peeping around the corner.

The nice thing about being a new mom, of course, is that people are infinitely sympathetic and kind. “Oh, you must be so busy! It’s ok if you’re late to the party!” “Oh, don’t worry if you forgot to bring the thing! You must have so much on your mind these days!” “You must be totally sleep-deprived – don’t worry about looking tired!” (Wait, what was that again? I look like crap?)

But I’m trying, gosh darn it. I don’t want to use a baby as an excuse to let everything fall by the wayside in a flaming, forgotten ball of fail. It’s just that when you have a baby, and things don’t go well, events tend to snowball much more dramatically.

For instance, I’ve been trying to keep up with the baking. Forget that “You have a little baby! Who has time to bake!” business. I’m going to sit baby in her highchair, and she’s going to watch mommy bake, and be inspired to become the world’s littlest pastry chef.

Except the recipe I was testing didn’t turn out. And then it was time for her nap so I had to go put her down. And then I remembered the laundry I left in the washer that needed to be moved to the dryer so I could do the next load. And then my mom called. And then the baby woke up. And then it was dinnertime. So I didn’t get a chance to retest the recipe.

It’s been this weird bad streak lately – despite my determination to get in the kitchen, I seem to have temporarily lost my recipe mojo. Nothing to do about it except keep plugging away when I can, right? Every baker has her unsuccessful days. As soon as I have a blog-worthy recipe, it’ll go up! Thankfully a whole pile of chocolate bars arrived to soothe my frustrations after some long, fruitless days.

I’ve visited TCHO, and I’ve baked with their excellent chocolate before, so new chocolate flavors to try out is a definitely cause for happiness. TCHO is well known for their flavor wheel, and how they label their chocolates by flavor notes – “fruity”, “nutty”, etc. Very fitting for their tech-driven roots. So I was surprised to see them go in an entirely new direction and introduce their first chocolate bars with inclusions, called TCHOpairings. They’re almost the complete opposite of their purist, minimally-packaged original chocolates. The TCHOpairings bars are stuffed with fruits and nuts, and presented in some hyper-colorful, psychedelic packaging designed by Wired’s former creative director John Plunkett.

There are three flavors: Galactic Gelato (dark chocolate with mint “astronaut ice cream” from Gelateraia Naia), Strawberry Rhubarb Pie (milk chocolate with strawberries, rhubarb, and bits of pie crust), and TCHunky TCHOtella (milk chocolate with roasted hazelnuts, hazelnut butter, and sea salt).

It’s clear that a lot of thought and development went into these bars. I was immediately drawn to the Galactic Gelato, because it seemed the most out there. The bar is 62% dark, pleasantly mild with virtually no bitterness, which makes it a nice base for the little bits of freeze dried mint gelato. The bits are intensely minty and have a nice little crunch – I find that this bar is really about the mint since it’s so dominant, so if you’re a mint chip ice cream fan, this is for you.

After convincing myself not to eat the entire Galactic Gelato bar in one go, I turned my attention to the other two bars and was quite impressed with them as well. They are both milk chocolate, which gives them a softer mouthfeel; combined with the fruits and nuts these are distinctly sweet chocolate bars – definitely more like candy bars, albeit very sophisticated ones. I think the bits of pie crust (made by Oakland’s Starter Bakery) in the Strawberry Rhubarb Pie is genius, plus their cookie-crisp texture gives much needed contrast to the smooth creaminess of the milk chocolate. I’m not sure I thought of pie when I ate it, but I did think all the flavors went together quite well. TCHunky TCHOtella is essentially gianduja – hazelnut paste mixed with chocolate. As a hazelnut fiend, I could eat gianduja by the jarful. TCHO ups the ante by adding in Piedmont hazelnut pieces and a sprinkle of sea salt to make it even more addictive.

I’m impressed with TCHO’s new bars – they have a lot of character, are impeccable in quality, and they add a new playful dimension to TCHO’s original, more straightforward chocolate lineup.

TCHOPairings bars are available at TCHO’s retail store on the Embarcadero in San Francisco and on their website. Thanks TCHO, you were just what I needed after some long weeks to get inspired again!

I was sent a set of TCHO’s TCHOpairings bars for review. All opinions are my own.

({SF} TCHO and Chocolate Mint Filled Cupcakes {Chocolate Review} Sweet Treats for Easter {Cookbook Review} I’m Back! With Apricot Lemon Hazelnut Bars {SF}TCHO Milk Chocolate Chip Brown Butter Cookies
reade more... Résuméabuiyad

How to Bake with Craft Chocolate (Plus Bar & Bean Giveaway!)

Happy (day after) National Chocolate Day! I’ve been getting plenty of intriguing new chocolate to keep me occupied – perhaps it’s a good thing I have a baby to prevent me from eating it all at once!

I was recently contacted by Bar & Bean, a new online shop for small-batch craft chocolate from around the world. Bar & Bean is dedicated to educating people about the qualities and nuances of craft chocolate, and they helpfully include tasting notes for the bars on their site, as well as detailed information about the chocolate makers.

I got the chance to meet Jasdeep, the creator of Bar & Bean, who is passionate about introducing people to the world of craft chocolate. He’s brought an impressive roster of chocolate makers onto Bar & Bean, many of whom I haven’t heard of or had the opportunity to try yet. Jas recognized that many people are either unaware of all the craft chocolate out there, or intimidated by the plethora of choices. By organizing his site with cocoa percentage and flavor profile searches, and adding tasting notes, he’s hoping to demystify the process. Jas has also developed some detailed personal notes on how to taste chocolate, which he shares in his tasting classes in San Francisco; check the Bar & Bean website for details.

As a introduction to Bar & Bean, I received a baker’s set consisting of five bars from Poco Dolce, Ritual, Escazu, and Dick Taylor. An early Halloween haul, indeed!

Ritual Balao 75% – I’d heard of this Denver-based chocolate maker but hadn’t had a chance to try it before. This elegant little bar is made from single origin Ecuador beans. Citrus and floral, very bright and lively, dry finish.

Poco Dolce Bittersweet with Sea Salt – San Francisco-based Poco Dolce does not make their own chocolate, but uses Guittard chocolate as their base for their flavor combinations. This bar is their classic, pure chocolate with a sprinkling of their signature grey sea salt. Very smooth, creamy, delightfully mellow. I confess a bias towards Poco Dolce since they are after all based in my backyard!

Dick Taylor Fleur de Sel 74% Dominican Republic – Dick Taylor makes some of the more gorgeous-looking bars around. This bar delivers a fruity, acidic punch – no wallflower this! I find the fleur de sel provides a welcome tangy counterpoint to this very robust bar.

Escazu 74% Pumpkin Seeds and Guajillo Chile, 74% Chipotle Chile and Vanilla – This Raleigh based chocolate maker is also new to me. Although they make plain bars with no inclusions, Bar & Bean chose to include two of their bars that do contain inclusions – chiles and pumpkin seeds.

Now, when I received this package of very fine chocolate bars, marked for baking, my eyebrows went up and I wondered, “For baking? Not eating?” Small-batch chocolate has been crafted to highlight the flavors and nuances of the cacao beans; often these particular harvests are quite small themselves and difficult to source. From my view all this painstaking work is primarily intended to be enjoyed on its own. Now, of course you *can* bake with them, but to bury all that careful craftsmanship beneath a pile of sugar and butter – well, it’s like using a bottle of Chateau d’Yquem to poach some peaches. You could do it, but I’d probably rather just drink that wine straight.  The quality of most craft chocolate leads to reason two: these chocolate bars are quite dear. As a quick example, the recipe below requires 8 ounces of chocolate to make about 8 servings of dessert. Most of the bars in this set are barely 2 oz. If you’re making dessert for a party, you could end up with quite a grocery bill (and if the amount doesn’t faze you, I’d like to be your new best friend). There’s no getting around the fact that craft chocolate is a premium product that is unlikely to ever be available at bulk prices. The question is raised, is it really worth spending extra for craft chocolate – and then mixing it into your chocolate cake?

I posed the question to the master of chocolate herself, Alice Medrich. By happy coincidence, one of her classic cookbooks (and one I consider a seminal part of my journey towards serious baker), Bittersweet, is being re-issued in an updated edition, Seriously Bitter Sweet. It now bears the subtitle, “The Ultimate Dessert Maker’s Guide to Chocolate”, and certainly this reference belongs on the bookshelf of any dedicated chocolate lover or baker.

Alice agreed with me that you want to showcase the carefully crafted chocolate, not hide them beneath a mountain of fat and sugar, and she recommended “minimalist recipes”. If you read Alice’s headnotes and essays in her cookbooks, you notice that she’s become ever more dedicated to paring out excess in her recipes over the years, reducing them to polished gems. From Seriously Bittersweet, she suggested making her Rich Hot Chocolate or Albert’s Mousse. Both recipes use water, which may surprise many people who associate rich chocolate desserts with more milk, more cream, more butter. However, Alice asserts that less fat allows you to taste the actual chocolate flavor much more clearly – and these desserts are by no means lacking in the indulgence factor!

Alice also suggests making truffles, another simple (and economical) way to sample several different chocolates. It’s one of my favorite ways to do a chocolate tasting and is a little more festive than simply setting out bowls of chocolate pieces.

I elected to use my Bar & Bean bars in Alice’s Intensely Bittersweet Soufflés. The headnote for this recipe reads, “This recipe is positively a showcase for the chocolate you make it with, so you must use a chocolate of distinction.” What more inviting dessert for the rapidly cooling weather and fast-approaching holiday season than a warm, rich soufflé ?

Although soufflé may sound intimidating, they’re really nothing to fear, and are actually quite versatile as they can made almost entirely ahead of time – one reason they’re a restaurant kitchen staple. You can make the batter and fill the ramekins beforehand, and store them in the refrigerator for up to 2 days. Then you pop them in the oven and like magic, you look like a dessert wizard.

To make them even more irresistible, I served the souffles with some cocoa nib-flecked cream – the subtle, sweet flavor of roast nibs in cream adds a wonderful layer to a intensely rich soufflé.

Thoughts on the results? These are some interesting picks for a baker’s bar set. They are all on the bittersweet end of the cacao percentage scale, which gives them more clarity and intensity than the lower-percentage chocolates. They’re ideal for the soufflé recipe, which is intended to draw out and showcase the chocolate. Not surprisingly, I thought the best results came from the Ritual and Dick Taylor chocolate bars, which were almost nothing but chocolate (the fleur de sel in the Dick Taylor bar was fairly subtle as the flakes were small and well incorporated). They were both intense, bittersweet bars and that intensity came through just slightly muted by the ingredients. In this case, I think it worked well as I probably would not eat a whole bar of their chocolate in one go, but mixed with some sugar and egg and butter, I was ready to scarf it down (oops). The Escazu Chipotle and Vanilla also fared well; I would have probably preferred to have control over what spices I added to my batter, but the end result was pleasantly piquant and different enough to stand out; if you’re using nice chocolate, you’d better hope that your guests will notice. The Poco Dolce, which delightful on its own, is probably the most challenging to bake with because the large sea salt flakes can seriously skew the result of any baked good. While the soufflé was tasty, I would sometimes get a few unexpected flakes of sea salt in my mouth. This bar might work better in a truffle where you can better appreciate the balance between chocolate and salt.

Although I’d not likely to make small-batch chocolate my regular baking chocolate (winning the lottery notwithstanding), I do have a better appreciation for how I could showcase them if I wanted to make a very special dessert. You can do the same: I’m giving away a Bar & Bean Baking Set to one lucky Dessert First reader! You can do you own experiments in your kitchen – or just enjoy them on their own (I won’t tell!)

Also, now through November 1st, receive 10% off your entire purchase at Bar & Bean by entering the promo code “cocoabeans” at checkout. Here’s your opportunity to discover some great craft chocolate!

To enter:

1. Leave a comment answering the question, ” What is your favorite baking chocolate?”

2. For a second entry, you can follow my Instagram, where I’ve been posting up images of my favorite chocolates lately. Post a comment here if you’ve done so.

The contest will run until November 3rd and I’ll randomly select and announce the winner on Monday November 4th. Good luck!

I was sent two sets of Bar & Bean Baking sets for my review. All opinions in this post are my own.

Recipe adapted from Alice Medrich's Seriously Bittersweet8 ounces (227 g) 70% chocolate, finely chopped1 tablespoon unsalted butter, plus extra for buttering ramekins1/3 cup whole milk3 large eggs, room temperature, separated1 large egg white, room temperature1/8 teaspoon cream of tartar1/3 cup (65 g) sugar, plus extra for dusting ramekins1 cup heavy cream2 tablespoons (20 g) roasted cocoa nibssugar to tasteIf you are making the soufflés right away, preheat oven to 375 degrees F, and position a rack in the lower third of the oven.Lightly butter and sugar the sides and bottoms of eight 5-ounce ramekins.Combine chocolate, butter, and milk in a metal and place over a saucepan of simmering water. Stir until chocolate is melted and mixture is smooth.Remove from heat and whisk in egg yolks until combined.In a medium dry bowl or in stand mixer fitted with whisk attachment, whip the four egg whites and cream of tartar together until soft peaks form.Gradually sprinkle in the 1/3 cup sugar and whip until stiff peaks form.Fold about one-quarter of the egg whites into the chocolate mixture to lighten. Add in the rest of the egg whites and carefully fold until just combined.Divide mixture among prepared ramekins, filling about three-quarters of the way full. You can either bake off the souffles now or cover with plastic wrap and store in refrigerator for up to two days.To bake soufflés, place ramekins on a baking sheet. Run your finger or a q-tip around the inside edge of the ramekins to keep the soufflé batter from sticking to the sides - this will help them rise straight.Bake for 14 to 16 minutes, until soufflés have risen, crack on top, and a wooden skewer inserted into the center are moist and gooey (but not liquid) - you are not making molten chocolate cakes!Remove soufflés from oven and serve immediately with the cocoa bean cream.Combine cream and cocoa nibs in a small saucepan. Bring just to boil over medium heat.Remove from heat and let steep for 20 minutes. Strain out nibs and chill cream in refrigerator for six hours (or until thoroughly cold).Whip to soft peaks for serving with the soufflés. Happy Valentine’s: Vanilla, Tonka Bean, Chocolate, Framboise {Cookbook Review} Cookie Craft {SF} {Chocolate Review} TCHO’s New TCHOPairings Bars {Giveaway} {SF} Teacake Bake Shop – In Praise of Local Bakeries
reade more... Résuméabuiyad

Pumpkin Oatmeal Chocolate Chip Cookie Dough Bites

So last week, I shared with you delicious apple oatmeal bites.  And, until I made these, those were my favorite.  Then, I made some pumpkin oatmeal cookie dough, added chocolate chips and called it an afternoon snack. 

They count as a snack because they are wholesome, and they aren’t baked.  They are only a cookie if they are baked, right?! 

Pumpkin Oatmeal Chocolate Chip Cookie Dough Bites – Adapted from Chocolate Covered Katie

Ingredients

  • 1 C quick cook oats
  • 1/2 C oat flour*
  • pinch of salt
  • 1/8 tsp. baking soda
  • 1/2 tsp. cinnamon
  • pinch of nutmeg or pumpkin pie spice
  • 1/8 C brown sugar
  • 1/8 C honey
  • 1/2 tsp. vanilla
  • 1/3 C sweet potato puree
  • 1/8 C dark chocolate chips

Directions

Begin by making the oat flour – to do so, take roughly 1/2 C oats and grind them in a food processor or blender until a flour forms.  Combine the oat flour with 1 C quick cooking oats in a large bowl.  Add in a pinch of salt, 1/8 tsp. baking soda, 1/2 tsp. cinnamon, and a pinch of nutmeg or pumpkin pie spice. 

Mix in 1/8 C chocolate chips (more or less to taste). 

In a second bowl, combine 1/8 C brown sugar, 1/8 C honey, 1/2 tsp. vanilla and 1/3 C sweet potato puree. 

Stir the dry ingredients into the wet ones until moist.  Then, refrigerate for 5-10 minutes. 

Shape into balls and place into an airtight container. Store in the refrigerator for up to 1 week. 

Makes about 12 1 T bite-sized cookie dough bites. 

Enjoy!

Store the leftovers in the refrigerator for up to 1 week.  Makes about 1 dozen. 

reade more... Résuméabuiyad

Cheesecake Stuffed Chocolate Chip Cookie Bars

I brought these cheesecake stuffed cookie bars to our neighbor’s this year for our annual spaghetti feed. 

They were a huge hit and we really enjoyed them. 

The original recipe called for a 9x9 baking dish, but having made them that way, I’d recommend an 11x7 baking dish.  The bars were quite thick, so I think baking them in the 11x7 pan will help. 

I used all whole wheat flour in this recipe, and it was delicious. 

Hope you enjoy them!

Cheesecake Stuffed Chocolate Chip Cookie Bars – Adapted from Mel’s Kitchen Café

Ingredients

  • 6 T butter, melted and cooled
  • 1/2 C brown sugar
  • 1/8 C sugar
  • 1 egg
  • 1 tsp. vanilla
  • 1 C white whole wheat flour
  • 1/4 tsp. baking soda
  • 1/8 tsp. salt
  • 3/4 C dark chocolate chips
  • 6 oz. cream cheese, Neufchatel preferred
  • 1/4 C powdered sugar
  • 1 egg white
  • splash of vanilla

Directions

Melt and cool 6 T butter.  Mix in 1/2 C brown sugar and 1/8 C sugar.  Then, mix in 1 egg and 1 tsp. vanilla. 

Sift together 1 C white whole wheat flour, 1/4 tsp. baking soda and 1/8 tsp. salt.  Add to the sugar mixture, mixing until just combined. 

Stir in chocolate chips. 

Arrange just over half of the cookie dough in the bottom of an 11x7 cake pan, lightly greased and/or lined with tinfoil.  Note: I used a 9x9 baking dish, and you can also do that but your bars will be very thick and you won’t get as much cheesecake in each bite.

Then, whip the 6oz. of cream cheese with 1/4 C powdered sugar.  Whip in the egg and a splash of vanilla and beat for 3 minutes until fluffy. 

Pour the cream cheese mixture over the top of the cookie crust. 

By the tablespoon, flatten the dough into a small circle.  Arrange these small dough circles over the top of your filling layer. 

Bake at 350 for 35-40 minutes.  Check that the edges are lightly browned.  Cool on a cooling rack.  When completely cooled, transfer the pan, covered, in the refrigerator. 

Cut into bars. 

Serve & enjoy. 

Store remaining bars in the refrigerator. 

reade more... Résuméabuiyad

Indoor S’mores

Although a fire pit is nice, and a campfire preferred, sometimes you just don’t have access to either. 

I’ve seen some roast marshmallows over a gas stove top, but, what’s a girl to do if her stove is electric? 

Make indoor s’mores in the oven. 

Don’t knock it until you’ve tried it. 

Less than 5 minutes, and your marshmallow even gets toasty!

Indoor S’mores

Ingredients

  • Graham crackers
  • Hershey’s Special Dark Chocolate (chips or bar)
  • Marshmallows
  • (for an extra special treat, if you’re not allergic, peanut butter!)

Directions

Arrange graham cracker halves on a cookie sheet.  Top each half with dark chocolate and marshmallows. 

Place under the broiler for 2-3 minutes, until marshmallows are slightly toasted.  Don’t leave them there too long or you’ll have a burnt marshmallow and/or graham cracker!

Carefully remove the tray from the oven.  Top with the remaining graham cracker halves. 

Enjoy!

reade more... Résuméabuiyad

Cake Recipe With Chocolate Flavor

Cooking has never been this easier with the introduction of the Internet. At first I thought that baking cakes was something that was hard and would take my whole day. This was short-lived as a friend of mine informed me that she was simply using the Internet to bake cakes for her family. This surprised me a lot since she was simply searching for a recipe that she thought she could manage. Once this was done, her work was simply to rush to the stores and find the ingredients that were recommended in the cake recipe that she was about to use. I thought over this and I knew it was time to try out my cooking skills. I tried this twice and the best recipe that I found to be easy was the chocolate one. I am quite certain that by following my way of cooking you would definitely prepare something that your family would enjoy. Below is how I cook my chocolate cake:

Ingredients of the cake recipe

1½ serving of butter - softenedSugar- 1¼ spoonfuls of sugarEggs - (number will vary)All-purpose flour - 2 cupsUnsweetened cocoa - 2 cupsBaking powder - 2 spoonfulsOne and a quarter servings of baking soda1½ spoonful of vanilla¾ cup of milk - buttermilk

Filling ingredients:

Pie fillings of cherry - 2 servings3-4 servings of cream that is chilled2 cups of confectioner's sugarMilk chocolate (shaved) - will help in garnishing the baked cake

Cooking tips and procedure for your cake recipe:

The first procedure of this cake recipe is to preheat your oven to 350 degrees Fahrenheit [should be done before you even start preparing your ingredients].

Using a non-sticking paper, you should line your cake pan to ensure that the cake does not stick on the sides of the pan.

Allow the butter that has been mixed with sugar to soften before you beat it using an electric mixer. Add the eggs to the mixture but make sure that you add an egg at a time as you mix well before adding another egg. You then need to add sifted flour, baking powder, buttermilk, cocoa, baking soda as you stir well to ensure that no lumps are formed. Once your oven has reached 350 degrees Fahrenheit, as mentioned earlier, slowly add the batter into the pan and allow it to bake till there is a middle set. Ensure that the bake time is about 40-45 minutes. Use a tooth pick to determine if it is ready or not. If it comes out with some crumbs in it then you will still need to place your cake in the oven for a few more minutes.

Serving

The best way to serve is when it is cold. Cut it into three or four layers for easy storage if the cake is big enough. This will ensure convenience in keeping it in a refrigerator.

reade more... Résuméabuiyad

How to Make Homemade Chocolate Icing

Everybody knows that the best part to any cake or cupcake is the icing. Everybody also knows that homemade icing wins over those sold at stores. That is why every cook should have their very own homemade chocolate icing recipe to whip up on a moment's notice. Once you have this basic chocolate icing mastered, you can play with it a bit to make variations like mint chocolate, mocha coffee, and more!

This simple and basic chocolate recipe will surely be a favorite of yours for years to come. The only things you need are a saucepan, a stove, a mixer, and a few quality ingredients.

First, start with the following ingredients:

Granulated sugar - 1 cup

Cocoa - ¼ cup

Butter - ¼ cup

Milk - ¼ cup

Vanilla extract - 1 teaspoon

For best results, always use quality ingredients. They make a big difference in a simple recipe like this one because there are so few ingredients. Try to use real butter, real vanilla, real cocoa, and whole milk if you can. It will taste the best this way.

If you absolutely need to cut calories, you can substitute the sugar for splenda, margarine for the butter, and use skim milk. The result will be slightly less creamy, but still tasty.

In a big bowl, mix all of the ingredients except for the vanilla. Transfer mixture to a large saucepan and bring to a boil. Boil for one minute then remove from heat. Add the vanilla extract after.

Let it cool partially for a few minutes, but be careful not let it cool all the way. You will need it a bit warm for the next part. For about three minutes, beat the mixture. You can do this manually, with a hand-held electric mixer, or a table top electric mixture, whichever you have available or prefer. You will want to continue until the icing is spreadable in texture.

Now you can move on to icing your cake, cupcakes, brownies, or cookies. This recipe for icing usually results in a thicker, creamier icing perfect for cupcakes and Brownies, but use it for whatever you like. No one will judge you if you only want to eat the frosting by itself. If you want to try the variations, add the flavoring like mint, coffee, hazelnut, etc. to the mixture at the same time you add the vanilla. The possibilities really are endless with this simple chocolate icing recipe.

reade more... Résuméabuiyad

Dark Chocolate Graham Crackers

Yep.  These would be amazing for s’mores. 

I doubt you’d even need additional chocolate bars… although, who can say no to extra chocolate, right?!

The recipe is simple and takes no more time than making your own crackers

We loved snitching them from our snack drawer, and they also worked great in our Carvel Ice Cream Cake copy-cat recipe.  Yum, yum!

Dark Chocolate Graham Crackers – Adapted from Elise Bakes

Ingredients

  • 1 1/2 C white whole wheat flour
  • 7/8 C powdered sugar
  • 1 tsp. baking powder
  • 1/4 tsp. salt
  • 1/2 C dark chocolate cocoa powder
  • 6 T butter, softened
  • 1 T honey
  • 6 T milk

Directions

Begin by sifting together 1 1/2 C white whole wheat flour with 7/8 C powdered sugar, 1 tsp. baking powder, 1/4 tsp. salt and 1/2 C dark chocolate cocoa powder. 

Using a fork or pastry blender, cut in 6 T softened butter.  Keep working at this step… it takes time.  Don’t give up early. 

Mix together the 1 T honey and 4-6 T milk; add slowly to the mixture. 

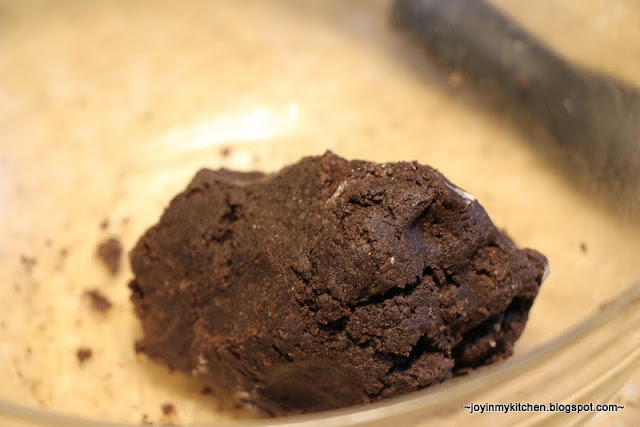
Pack the dough together in a ball; when it sticks, you’ll know you have your base ready. 

Break off some dough in small chunks.  Roll out the dough to 1/8 – 1/4 inch thickness.  

Place on parchment paper.  Then, cut the dough into 1 1/2 – 2 inch squares; or if you prefer, make them look more like graham crackers. 

Poke them with a fork. 

Bake on parchment on a cookie sheet in a pre-heated oven at 325 for 12-15 minutes. Check after 10 and remove any crackers around the edges (which seem to always get done faster than the others!). 

Split apart the center crackers and spread them out for the last few minutes of baking – it will help them get crispy. 

Remove from the oven and transfer the crackers to a cooling rack. After about 5 minutes on the rack you’ll be able to tell if the crackers are crispy enough.  If not, simply return them back to the oven for additional baking.

Repeat until all the dough is used. 

Store in an airtight container for up to 2 weeks (although they won’t last that long!). 

Like I said… they would make excellent S’mores! 

reade more... Résuméabuiyad