Pages

.

Showing posts with label snacks. Show all posts

Pumpkin Oatmeal Chocolate Chip Cookie Dough Bites

So last week, I shared with you delicious apple oatmeal bites.  And, until I made these, those were my favorite.  Then, I made some pumpkin oatmeal cookie dough, added chocolate chips and called it an afternoon snack. 

They count as a snack because they are wholesome, and they aren’t baked.  They are only a cookie if they are baked, right?! 

Pumpkin Oatmeal Chocolate Chip Cookie Dough Bites – Adapted from Chocolate Covered Katie

Ingredients

  • 1 C quick cook oats
  • 1/2 C oat flour*
  • pinch of salt
  • 1/8 tsp. baking soda
  • 1/2 tsp. cinnamon
  • pinch of nutmeg or pumpkin pie spice
  • 1/8 C brown sugar
  • 1/8 C honey
  • 1/2 tsp. vanilla
  • 1/3 C sweet potato puree
  • 1/8 C dark chocolate chips

Directions

Begin by making the oat flour – to do so, take roughly 1/2 C oats and grind them in a food processor or blender until a flour forms.  Combine the oat flour with 1 C quick cooking oats in a large bowl.  Add in a pinch of salt, 1/8 tsp. baking soda, 1/2 tsp. cinnamon, and a pinch of nutmeg or pumpkin pie spice. 

Mix in 1/8 C chocolate chips (more or less to taste). 

In a second bowl, combine 1/8 C brown sugar, 1/8 C honey, 1/2 tsp. vanilla and 1/3 C sweet potato puree. 

Stir the dry ingredients into the wet ones until moist.  Then, refrigerate for 5-10 minutes. 

Shape into balls and place into an airtight container. Store in the refrigerator for up to 1 week. 

Makes about 12 1 T bite-sized cookie dough bites. 

Enjoy!

Store the leftovers in the refrigerator for up to 1 week.  Makes about 1 dozen. 

reade more... Résuméabuiyad

No-Bake Apple Cinnamon Energy Bites

What’s not to love about granola, applesauce, apple bites, and cinnamon in a no-bake granola bite? 

These are perfect for an after schools snack, and are easy enough for even your kids to help make. 

No-Bake Apple Cinnamon Energy Bites

Ingredients

  • 1 C quick cook oats
  • 1/2 C oat flour*
  • pinch of salt
  • 1/8 tsp. baking soda
  • 3/4 tsp. cinnamon
  • pinch of nutmeg
  • 1/4 C unsweetened applesauce
  • 1/8 C brown sugar
  • 1/8 C honey
  • 1/8 C apple maple sauté

Directions

Take roughly 1/2 C of oats and pulse it in a blender or food processor until a smooth powder forms; measure out 1/2 C of oat flour and combine this oat flour* with 1 C quick cooking oats.

Add in a pinch of salt, 1/8 tsp. baking soda, and 3/4 tsp. cinnamon along with a pinch of nutmeg.  Stir well. 

Mix in 1/4 C unsweetened applesauce, 1/8 C brown sugar and 1/8 C honey. Add in 1/8 C cooled apple maple sauté.  Mix until all ingredients are moist. 

Refrigerate for 10 minutes. 

Then, using a cookie scoop, create 1 T balls of the granola apple mixture.  You’ll get about 12-14 energy bites in total. 

Store in an airtight container in the refrigerator for up to 1 week. 

Enjoy!

reade more... Résuméabuiyad

Fruit & Yogurt Wraps

A tasty and refreshing breakfast or after school treat. 

Tortillas stuffed with yogurt, honey and fruit.  Rolled in cinnamon and sugar. 

Yum!

Fruit & Yogurt Wraps – Adapted from Tidy Mom

Ingredients

  • 4 fajita-sized tortillas
  • 1/2 T butter, melted
  • 3 T sugar
  • 1/2 tsp. cinnamon
  • 1 C plain Greek Yogurt (or your favorite yogurt variety)
  • 4 tsp. honey
  • 1 C frozen fruit or 1/4 C your favorite fruit preserve

Directions

Begin by melting 1/2 T butter and using a pastry brush to coat one side of each fajita.  Place the fajitas butter-side down one at a time onto a plate where 3 T sugar have been mixed with 1/2 tsp. cinnamon. 

Top each tortilla with 1/4 C yogurt, spreading it in the center, leaving about a 1-inch margin around the edge. 

Drizzle approximately 1 tsp. honey over the yogurt. 

Layer fruit or fruit preserve over the top. 

We enjoyed blueberry, raspberry frozen fruit tucked inside these, as well as a raspberry rhubarb preserve option.  Yum! 

Note: if you use a preserve, like the raspberry rhubarb pictured above, be sure to leave at least 1 inch along the margin and spread your filling thing; otherwise it will ooze out when you roll it up. 

Roll up the tortilla and place them onto a cookie sheet. 

Freeze for 20-30 minutes. 

Slice in half. 

Place into a freezer-friendly bag or container. 

To serve, thaw at room temperature for 25-30 minutes before enjoying.  Don’t let them sit out too long or they will get soggy.  We found about 25 minutes was perfect.  These can easily be taken out of the freezer when you get up in the morning and they’ll be ready by the time you make your way to the kitchen for breakfast! 

They also make a great afternoon snack. 

Enjoy!

reade more... Résuméabuiyad

Dark Chocolate Graham Crackers

Yep.  These would be amazing for s’mores. 

I doubt you’d even need additional chocolate bars… although, who can say no to extra chocolate, right?!

The recipe is simple and takes no more time than making your own crackers. 

We loved snitching them from our snack drawer, and they also worked great in our Carvel Ice Cream Cake copy-cat recipe.  Yum, yum!

Dark Chocolate Graham Crackers – Adapted from Elise Bakes

Ingredients

  • 1 1/2 C white whole wheat flour
  • 7/8 C powdered sugar
  • 1 tsp. baking powder
  • 1/4 tsp. salt
  • 1/2 C dark chocolate cocoa powder
  • 6 T butter, softened
  • 1 T honey
  • 6 T milk

Directions

Begin by sifting together 1 1/2 C white whole wheat flour with 7/8 C powdered sugar, 1 tsp. baking powder, 1/4 tsp. salt and 1/2 C dark chocolate cocoa powder. 

Using a fork or pastry blender, cut in 6 T softened butter.  Keep working at this step… it takes time.  Don’t give up early. 

Mix together the 1 T honey and 4-6 T milk; add slowly to the mixture. 

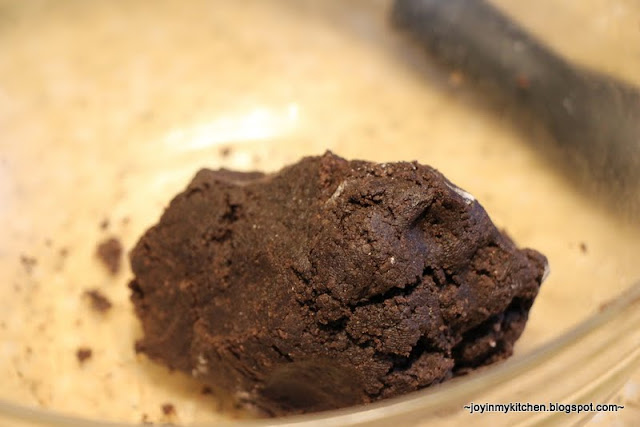
Pack the dough together in a ball; when it sticks, you’ll know you have your base ready. 

Break off some dough in small chunks.  Roll out the dough to 1/8 – 1/4 inch thickness.  

Place on parchment paper.  Then, cut the dough into 1 1/2 – 2 inch squares; or if you prefer, make them look more like graham crackers. 

Poke them with a fork. 

Bake on parchment on a cookie sheet in a pre-heated oven at 325 for 12-15 minutes. Check after 10 and remove any crackers around the edges (which seem to always get done faster than the others!). 

Split apart the center crackers and spread them out for the last few minutes of baking – it will help them get crispy. 

Remove from the oven and transfer the crackers to a cooling rack. After about 5 minutes on the rack you’ll be able to tell if the crackers are crispy enough.  If not, simply return them back to the oven for additional baking.

Repeat until all the dough is used. 

Store in an airtight container for up to 2 weeks (although they won’t last that long!). 

Like I said… they would make excellent S’mores! 

reade more... Résuméabuiyad

Crunchy Cranberry Chocolate Granola Bars

These bars make a delicious summer treat – great for a road trip or picnic at the park.

They are a crunchy granola bar, but have outstanding flavor. 

Honestly, they were a little crumbly, but hard packing of the granola bars before and during baking helped.  I’d up the oil and honey just a tad to make sure there is enough of a binder for bars.  There are more great tips in the comments of the original recipe too. 

Crunchy Cranberry Chocolate Chip Granola Bars – Adapted from Weelicious

Ingredients

  • 4 C Old Fashioned Oats
  • 1/4 C whole wheat flour
  • 1/3 C brown sugar
  • 1/2 tsp. salt
  • 4 T olive oil (I’d go up to 1/4 – 1/3 C)
  • 1/2 C honey
  • 1 tsp. vanilla extract
  • 1/4 C Craisins
  • 1/4 C dark chocolate chips

Directions

In a large bowl, combine all the dry ingredients: 4 C oats, 1/4 C whole wheat flour, 1/3 C brown sugar, and 1/2 tsp. salt.  Add in 1/4 C craisins and 1/4 C dark chocolate chips. 

Stir well. 

Drizzle in 1/4 C olive oil, 1/2 C honey and 1 tsp. vanilla extract. 

Stir, stir, stir until all the ingredients are well combined and everything is moist.

Pack the bars into half a sheet cake pan that has been lined with parchment paper (or a silicone baking sheet) and lightly sprayed with olive oil. 

I found the easiest way to pack the granola bars was using a potato masher and a piece of parchment paper. 

Then, bake at 325 for 25-35 minutes until lightly browned. 

I found it helpful to take the bars out after 10ish minutes and pack them back down using the parchment paper and potato masher.  Then, return them to the oven to finish cooking. 

Leave the bars to cool in the pan for 5-10 minutes, then lift the bars up out of the pan onto a cutting board.  Cut the bars using a really sharp knife and/or a pizza cutter while the bars are still slightly warm. 

Makes about 20 bars. 

Store in an airtight container. 

reade more... Résuméabuiyad