Pages

.

Showing posts with label Indian Cuisine. Show all posts

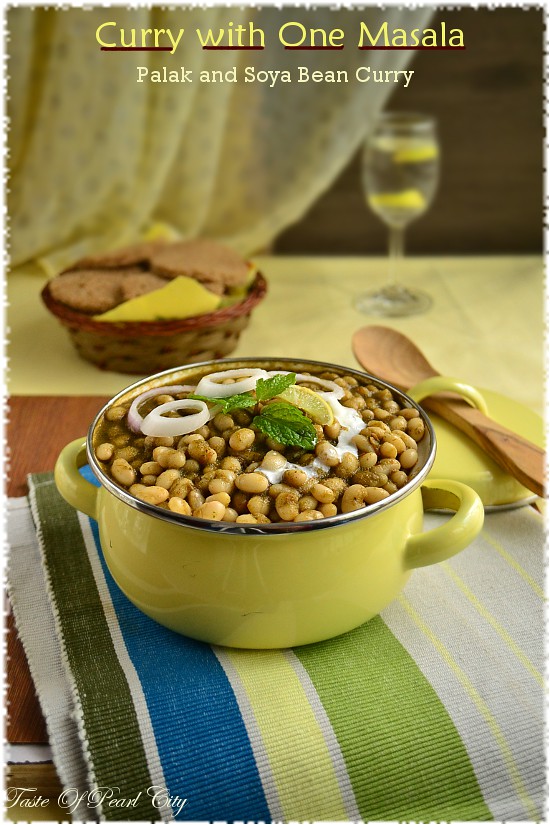
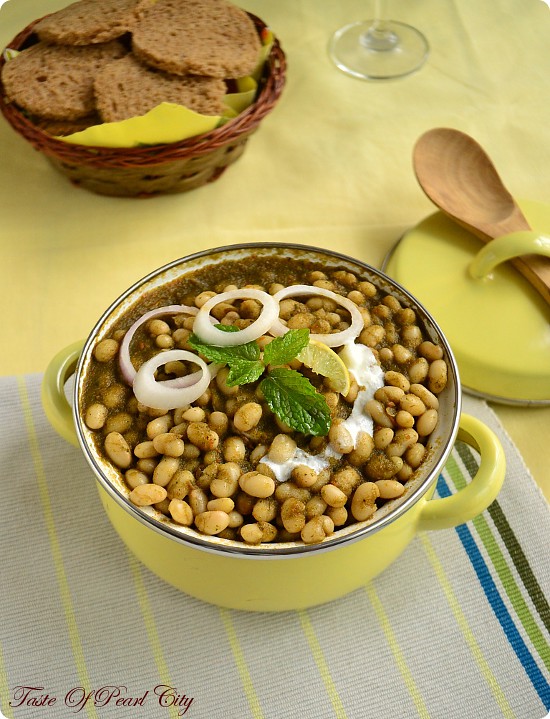
Curry With One Masala- Palak Soya Bean Curry

It's been gloomy and rainy for the past few days, somehow I don't feel like doing anything when the sun hides into the clouds and the day becomes gloomy.  No matter how tired and lazy I feel, still  have to fulfill few of my basic instincts, like eating.  I can go on with some take away or some snacks to munch on but that's definitely not going to satisfy the nutritional requirements for my body. 


So I'm forced by myself to cook and eat some healthy food and at the same time without too much chopping or cooking.  Thinking about some spicy food which is apt for this season, at the top of my head I could dream about poori channa, parotta chalna etc. Oh! no that requires quite lot of time.
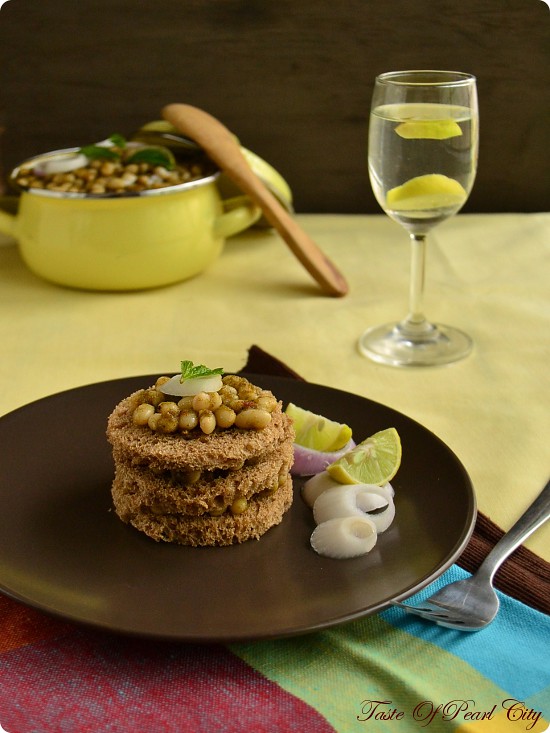
 
 Alright, now having some soaked soya beans and fresh palak in my refrigerator, all I could think about is Palak soya bean curry. After palak panner, Murg Palak, we all love making Palak channa or Palak peas too, this is exactly the same category.  Although Palak Channa is the best for me, I love combining Palak with other pulses and beans too.

Note:
The same curry style can be adapted for Chickpeas or Peas instead of Soyabeans. Channa Masala can be found in any Asian or Indian Grocery stores

Serves 2
Preparation Time: 10 minutes
Cooking Time: 20 minutes

Ingredients:
Cooked Soya beans- 100 gm
Palak- 100 gm ( cleaned and chopped )
Tomato- 2 medium sized (pureed)
Ginger garlic paste- 2 tsp
Cumin seeds- 1 tsp
Channa Masala powder- 2 tsp
Oil- 1 tbsp
Salt to taste

Method:
Heat Oil in a pan. Add the cumin seeds, then ginger garlic paste.  Stir it for 2 minutes until the raw smell goes away. Now add the tomato puree, stir well. Cover and let it simmer for about 3 minutes. When you open the pan, the colour of the tomatoes should be in bright red colour and the oil should start leaving the sides of the pan. 
At this stage add the cooked soya beans, channa masala powder, salt and stir well.  Cover and cook for a few minutes until the masala gets incorporated well.  Finally add the palak puree, stir well, let it simmer for 2 minutes. Switch off the flame. Serve warm withbread, chapathi's or rice.

To make the palak puree:
Blanch the washed palak in hot water for 2 minutes.  Drain the water and wash in cold water immediately. Puree the palak in a
blender into a smooth paste by adding little water.
reade more... Résuméabuiyad

Instant Phirni / Semolina Pudding

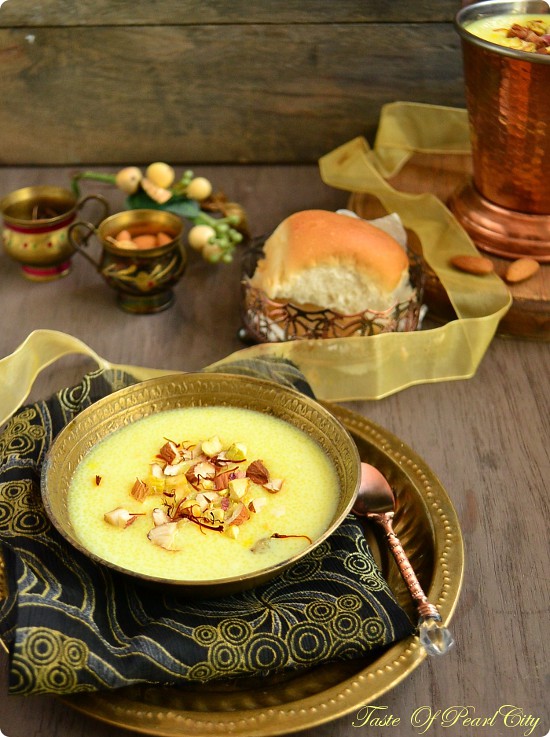
Festive season, Get together with friends , dinner party, wedding occasion,  dessert which comes to my mind immediately is Phirni.  After a heavy main course like Biryani or any spicy curries, phirni is something which cools and soothes you.  A traditional phirni is made using ground rice, although it's not that complicated process, I always prefer the instant version using semolina.  Personally I don't see any wide difference between semolina phirni and ground rice phirni in terms of texture and flavour.  Also this Instant version is a solution to quick dessert.


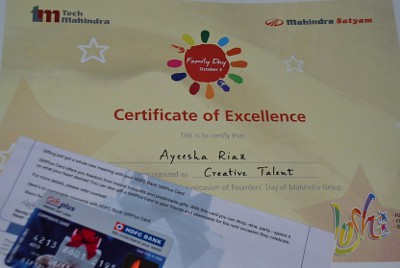
In this sweet moment I have something to share with you. Few weeks back  my husband gave me a surprise that I had won an award from his company, I was astonished that why would his company give me award and for what.  He said it's Mahindra's Rise value.  Many of you might have come across about this Rise value through adverts or friends.  If not let me give a short note about Rise- accepting no limits, thinking alternatively and driving positive change.

So the employees of Mahindra can nominate their family members if they have achieved something in the field of Education, Sports, Music, Creative Arts.  My husband nominated me in the field of Creative Arts for my blog and I got it.  A Certificate and a gift card worth Rs.5000/-  Rise is nice isn't?
 Thanks to my husband who nominated me and  thank you Mahindra for this Rise initiative.  To know more about Mahindra Rise click here.
 
When I was in off blogging mode , this is one of the reason which made me get back into blogging and also I would like to thank those wonderful blogger and non blogger friends who cheered me to get back to blogging, so here I am with this sweet relish.

Serves 8
Cooking Time: 15 minutes

Ingredients:
Milk- 1 litre
Semolina- 4 tbsp
Sugar- 4 tbsp
Cardamom powder- 1 tsp
Saffron- 1/2 tsp soaked in 1 tbsp warm milk
Kewra essence- 1 tsp
Almonds, pista- each 10, chopped coarsely

Method:
Boil the milk, once it boils, add the semolina little by little stirring continuously.  Once the semolina gets cooked, add the sugar and keep stirring until the sugar gets dissolved completely .  Now add the cardamom powder, saffron soaked in milk, kewra essence and chopped nuts,stir well. Switch of the flame.  You can serve it immediately while it's still warm with some chopped nuts and saffron on top for garnish or let it cool down, chill in the refrigerator and serve it cold, either way it tastes good.

Note:
The amount of sugar is bit low according to our taste buds, so you can add more sugar if you want.  Also a tablespoon of condensed milk at the end will give much more rich flavours.

Sending this sweet to Feast Of Sacrifice, Milk Sweet Recipes and Festive Food hosted by Cuisine Delights originally started by Recipe Junction.


reade more... Résuméabuiyad

Dahi Vadas ( Baked Version)

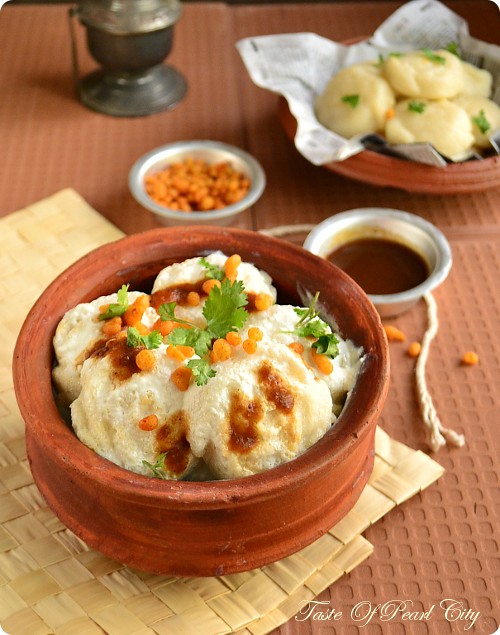
In my last post I mentioned that we are just ready for this month challenge in Fried to Favourite and here we are.  This month I made Dahi Vadas for our challenge Fried to Favourite.  We always enjoy Dahi vadas, particularly during Ramdhan, it's a must on Iftar table.
As Ramadhan is getting very closer, I was super excited to make these baked version of Dahi vadas.   After all feeding our family with the best food, fills our heart with tranquility.

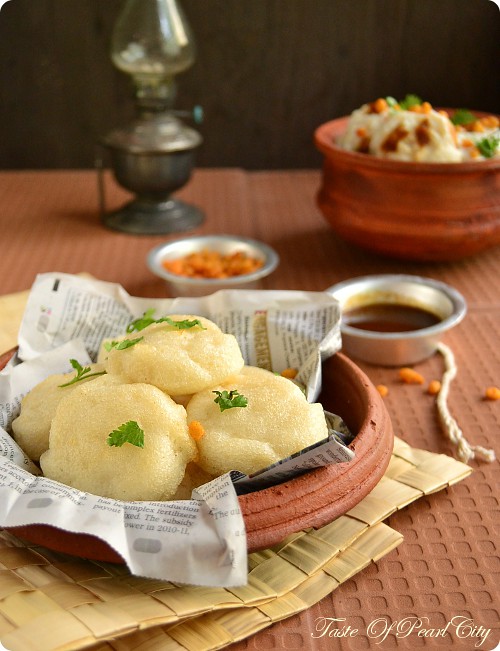
I baked these vadas in a mini bun tin, for which you have to spray some cooking spray or grease lightly with oil to avoid sticking to the pan.  If you are using silicone mould, you can go for zero oil.  When these baked vadas are used in Dahi vadas, it's really hard to identify that they are baked and not fried.  To check out what our other members have been doing for this challenge, please click here.


Preparation Time: 10 minutes
Cooking Time: 20 minutes
Serves 4 to 5

Ingredients:
Dosa batter- 1 litre  ( recipe follows )
Yogurt- 500 ml
Tamarind chutney- few teaspoon  ( recipe follows )
Savoury Boondhi- 1 tbsp
Coriander leaves- 2 tbsp ( finely chopped )
Oil- to grease the tray
Salt to taste

Method:
Preheat the oven to 200 degree Celsius.  Grease lightly the bun or muffins. Fill it with the batter.  Put it inside the oven for 20 minutes.  Insert a toothpick or skewer to check if it's cooked.  Take it out from the oven.  Carefully remove it from the tin with the help of a spoon.
Beat the yogurt along with salt and few tablespoons of water.  Drop the baked vadas in the yogurt.  Drizzle with tamarind chutney, sprinkle savoury boondi and coriander leaves on top.  Serve it immediately or keep it in the refrigerator until you serve.

Note:
In case you are baking the vadas well ahead before you serve.  Soak the vadas in hot water for about 5 minutes and then drop it in yogurt.  Also fresh dosa batter makes the best, than the old one.

Dosa Batter Recipe

Ingredients:
Parboiled rice- 3 cups
Urad dhal- 1 cup
Salt to taste

Method:
Soak the rice and dhal separately for about 3 to 4 hours.  Grind them separately.  Rice batter has to look slightly coarse and urad dhal batter has to come fluffy.  Mix the two batter along with salt and set aside for about 6 to 8 hours until they ferment and doubled in bulk.  Then use the batter as suggested in the recipe.

Tamarind Chutney Recipe

Ingredients:

Tamarind- a lemon sized ball soaked in water
Dates- 4 pitted
Jaggery- 3 tsp
Chilly powder- 1/2 tsp
Ginger powder- 1/4 tsp
Methi powder- 1/4 tsp
Salt to taste

Method:
Extract the juice from the tamarind soaked in water.  Grind the dates along with little tamarind water.  Add the tamarind juice, ground dates, chilly powder, methi powder, salt and 1 cup of water in a pan. Bring it to boil, reduce the flame and simmer it until you get a thick sauce like consistency.
Cool this sauce completely and store it in the refrigerator for about a month and it can be used whenever necessary.

Linking this recipe with Nupur's Fried to Favourite , Ramadhan friendly recipes and Bake Fest hosted by The Pumpkin Farm, originally started by Vardhini 


reade more... Résuméabuiyad

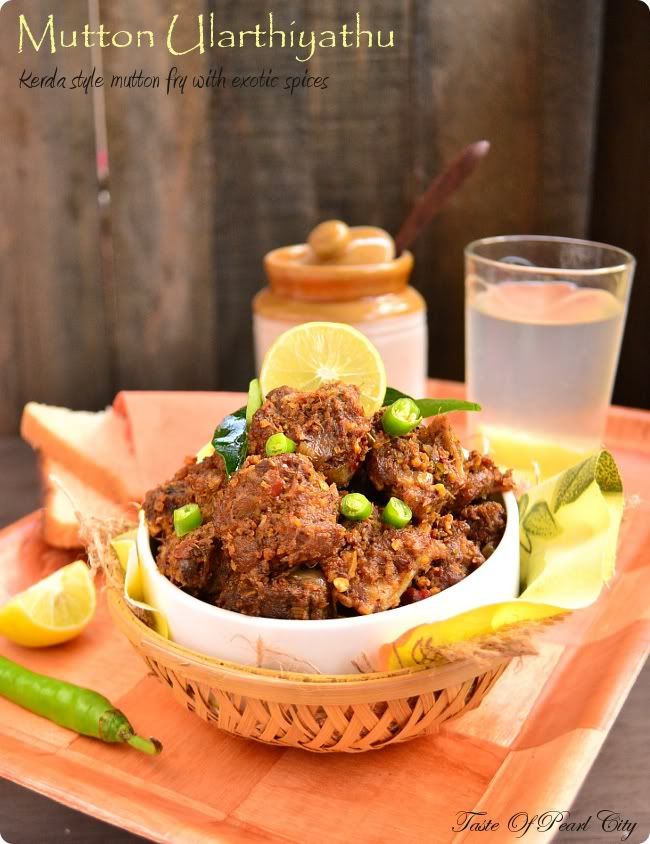
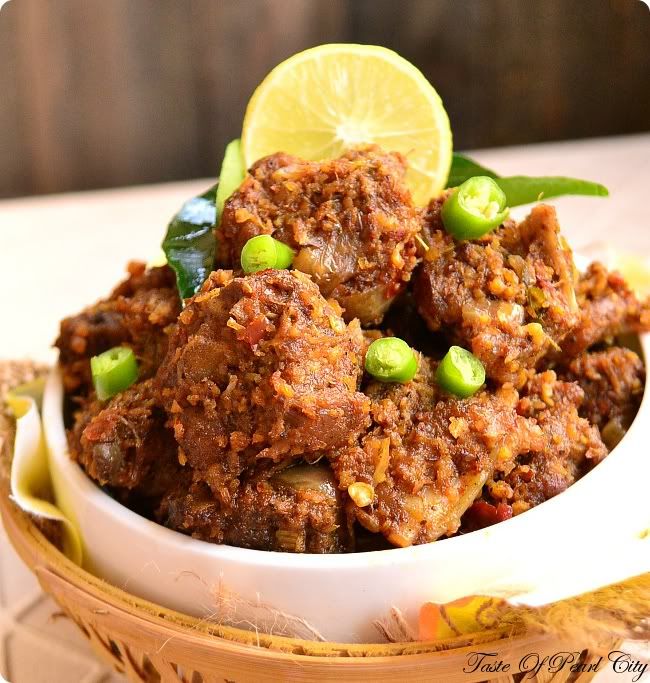
Mutton Ularthiyathu / Mutton Dry Fry

Mutton Ularthiyathu is a traditional recipe from Kerala.  Originally this recipe is made with beef, since we don't take beef much, I made this with mutton.  When it comes to Non-vegetarian, I prefer these dry fry or kebabs compared to curries or kurmas.  You can get the best of this recipe when it's prepared in a clay pot.  The aroma released from the spices while cooking might lead to even some uninvited guests ;-)
Serve this with plain white and any curries or with chapathi's, parathas and appam.


Preparation Time: 10 minutes
Cooking Time: 45 minutes-1 hour
Serves 4

Ingredients:
Mutton- 1/2 kg ( preferably boneless )
Onion- 1 medium sized ( sliced thinly )
Green chilly- 2
Ginger garlic paste- 2 tsp
Fresh grated coconut- 2 tbsp
Lemon- juice of 1/2 a lemon
Garam masala- 1/4 tsp
Turmeric powder- 1/4 tsp
Oil- 1 tbsp
Salt to taste

To be ground:
Coriander seeds- 3 tsp
Red chillies- 4
Black peppercorns- 1/2 tsp
Fennel seeds- 1/2 tsp
Cinnamon- 1/4 inch stick
Cloves- 1

Method:

1. Dry fry all the ingredients in the to be ground list and grind into a fine powder or paste by adding little 
    water.
2. Wash the mutton well, marinate with 1/2 of the ground masala, ginger garlic paste, turmeric powder,
    garam masala and lemon juice for about 1 hour.
3.  Cook the marinated mutton in a pressure cooker for upto 5 whistles without adding any water or oil.
4.  Heat oil in another kadai or heavy bottomed pan, add onions, curry leaves, green chillies and  coconut.
     Saute well until the onions look lightly brown in colour.    
5.  Now add the cooked mutton, stir well.  Add salt to taste, cover it with a lid and cook until all the water
     gets absorbed and it looks completely dry.
6.  Serve warm with rice, chapathi's or parathas.

Note:
Whole spices can also be replaced with spice powder.

Tip:
To get nice smoky flavour like barbeque, add thinly sliced lemon at the end  before switching off the stove, stir it for about 5 minutes.  Then remove the lemon before serving.
reade more... Résuméabuiyad

Rajma Masala Rice

In summer although we look out for something cool like ice creams, smoothies or drinks often, still we have to fill our tummy with some food to meet the nutritional requirements for our body.  Since aircondtioning the kitchen is not in reality here, the best way is to keep the cooking simple and quick, at the same time nutritious.
So I always look for one pot meal which is filled with grains, vegetables and pulses, which makes life much more easier.  This is one such meal which can be made in minutes.  Rajma can be replaced with any other pulses or mix of vegetables too.  Well, there isn't much to talk about anything else today, so let's move on to the recipe now.


Preparation Time: 10 minutes
Cooking Time: 20- 30 minutes
Serves 4

Ingredients:
Basmati Rice- 2 cups
Dried Red Kidney beans- 1/2 cup
Onion- 1 big sized ( chopped finely )
Tomato- 1 big sized ( chopped finely)
Ginger garlic paste- 2 tsp
Green chilly- 1
Biryani masala powder- 3 tsp
Cinnamon stick-1/2 inch stick
Cumin seeds- 1 tsp
Coriander leaves- 4 stalk chopped finely
Mint leaves - 2 stalk chopped finely
Oil- 1 tbsp
Salt to taste

Method:
Soak the kidney beans in water for 3 hours and cook it in a pressure cooker for 3 to 4 whistles.
Heat oil in a heavy bottomed vessel or pressure cooker.  Add cinnamon stick and cumin seeds.  Add ginger garlic paste, onion and saute well until the raw smell goes. Then add tomatoes and saute well. Cover the vessel with a lid and cook until tomatoes gets mashed up. Add biryani masala powder, green chilly, coriander and mint leaves.  Add the cooked kidney beans, rice, salt and 4 cups of water. If using a pressure cooker, cook upto 2 whistles.  In a normal vessel, keep the flame in medium to low and cook until the rice is done.  Serve the rice warm with just raita or any curries.

reade more... Résuméabuiyad

Home made Nannari Sherbet from scratch

It's summer here in India, actually not just summer, it's ssssummmmeeer.  Why I want to stress the summer is, summer isn't much of fun here, although it's summer vacation for kids, it's like visiting friends and family, couldn't enjoy it to the most.  The Sun has started showing the heat at it's peak, couldn't help about it, since we can't fight with nature. Along with this the frequent power cuts which makes it much more worse. Now we could do nothing with nature, either the power cut.  So all we can do is just intake something to reduce the body heat, to avoid all scorching and scratching.
  After taking gallons and gallons of water, still doesn't seem to satisfy our dry and sore throat.  So we need something something else more than water to balance the heat here.  Yes, it's hot and humid here but still there are few solutions which can manage the heat to some extent and reduce the body heat.

Tender coconut water is one of the best thirst quencher, it also acts as a natural coolant for our body, apart from that melons which are available in abundance everywhere here, which is again one of the best thirst quencher.  Now coming to the hero of our story, Sherbet.  There are many different type of Sherbets and Squash are available, the one which is most common and popular here in India is Nannari Sherbet or may be only in South India.

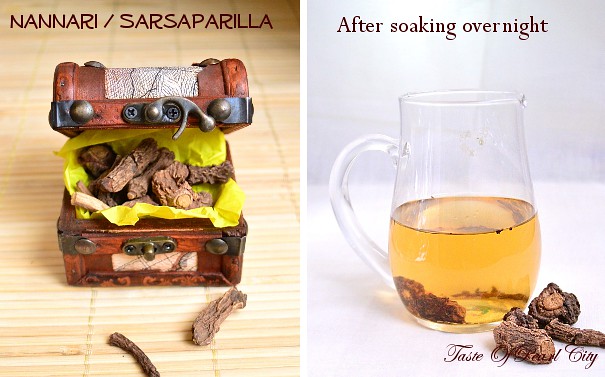
Nannari or Sarsaparilla is a root which  acts as a natural coolant for our body.  Nannari is good for many skin infections, it also purifies the blood. Regular intake of it reduces the burning sensation in stomach.  Our ancestors have made this   syrup using nannari root, jaggery and lemon juice.  After years , jaggery is been replaced with sugar.  Although Jaggery is a better version, there are some myths that jaggery increase the body heat which may be even true.  So I made the syrup using sugar and added a bit of colour to give the traditional look of Nannari Sherbet, a bright vibrant red colour.  Nannari Sherbet which is available in markets are normally tinted with yellow, orange or red.  You can leave it without adding any colour, which would be a perfect glass of healthy drink. 
When you have a bottle of syrup ready, add a squeeze of lemon juice, some water and few ice cubes, time to chill out...

Preparation Time:5 minutes
Cooking Time: 15 minutes+ 8 hours soaking time
Makes nearly 400 ml of syrup

Ingredients:
Nannari root- 5 to 6 pieces
Water- 1/2 litre
Sugar- 5 tbsp
Lemon - juice of 4 lemon
Few drops of food colouring of your choice (optional)

Method:
Break the nannari root with the mortal and pestle.  Break the outside hard and take the inner part of the root.  Powder it in a blender.  Heat the water until it starts boiling.  Take it off from heat, add the powdered nannari.  Cover it and let it rest for 1 whole night or minimum of 8 hours.
After 8 hours, strain the liquid through a fine filter or muslin cloth.  Add the sugar to the strained liquid and heat it again.  Stir continuously until the sugar dissolves completely.  Let it boil until it reaches a sticky consistency.  Take it off from heat, add the colourin and  let it cool down completely.  Add the lemon juice and stir well and store it in a sterilized bottle.  This can be kept for upto 2 to 3 weeks in the refrigerator.

To prepare the juice:
Nannari syrup- 1 tbsp
Water- 200 ml
Lemon- Juice of 1/2 a lemon
Sugar if needed
Few ice cubes
Basil seeds- 1/2 tbsp (soaked in water)

Method:
Add everything to a tall glass, give it a good stir and enjoy .

reade more... Résuméabuiyad

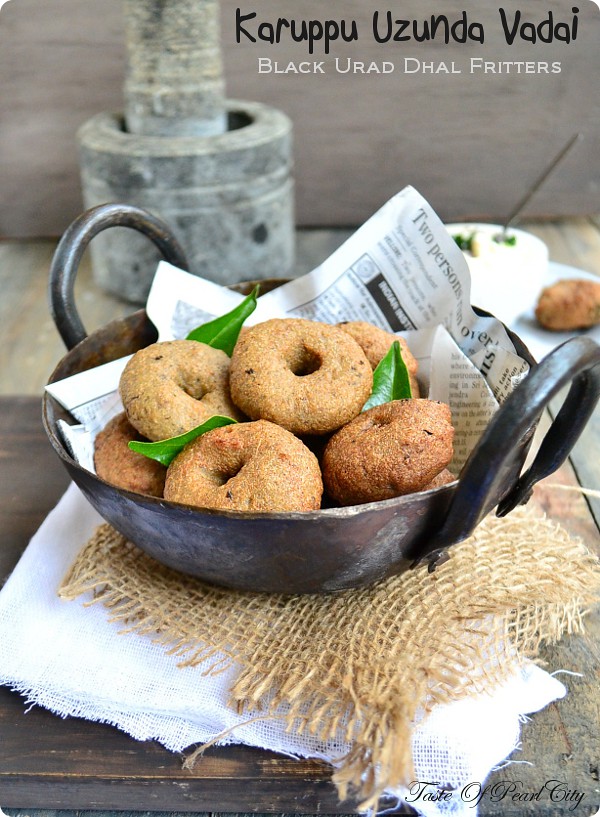
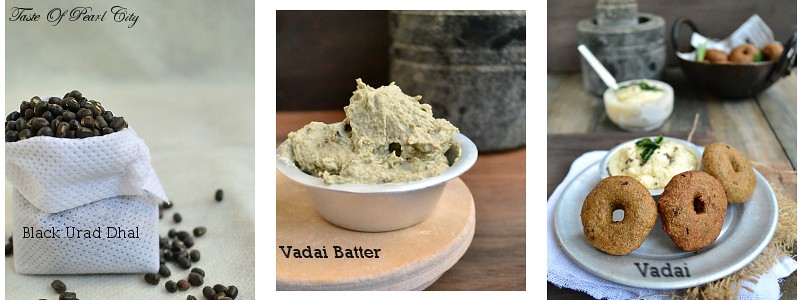
Karuppu Uzunda Vadai/ Black Urad Dhal fritters

If you are a regular read to my blog, you should have read this post about Uzunda Vadai already in my blog. It's a typical South Indian snack made with urad dhal. This is exact the same version of vadai, made with same lentils.  So, now this is the question,what's the difference between these two vadas?  The only difference is,  in this vadai I have used the lentils along with the husk/ skin.  Black Urad dhal by it self is considered to be healthy,when it's used along with the husk/skin  it's considered to be much more healthier.


I couldn't find any particular source or link to show the health benefit of these pulses but I have heard lots of  benefits through our grandmas and great grandmas . Not just my grandma, from many others too.  So when there is more than one source of information makes the same point,  the information might be right to some extent. Do you agree?

Here are few benefits of these lentils to my knowledge.  Apart from being a great source of energy, these lentils when used along with the husk known to reduce the risk of diabetes. It strengthens the bones, it prevents the thinning of bones due to ageing.  Mostly our grandmas mention that this strengthens the hip part for women,which means it avoids backache in women.  Regular consumption of these lentils strengthens your backbones.  Generally the best way to have these lentils is as a porridge,  but today I have used these for vadai's.  It may not look very appetizing,  but the flavours are right there,of course along with all the goodness.

Preparation Time: 15 minutes+ soaking and grinding time
Cooking Time: 20 minutes
Makes about 20 vadai's

Ingredients:
Black urad dhal with skin- 150 gm (soaked in water for minimum of 8 hours or overnight )
Rice- 1 tbsp ( soaked in water for 2 hours )
Ginger- 1/4 inch ( finely chopped )
Black pepper corns- 8 to 10
Small onion- 3 finely chopped
Curry leaves- 5 to 6 leaves roughly chopped
Salt to taste
Oil for deep frying

Method:
Grind the soaked lentils and rice in a grinder by adding very little water.  Once it looks like a semi coarse paste, remove it from the grinder.  Add salt and beat well.  The batter should not be too watery or too fine.  It should resemble a thick batter and lightly coarse paste.  After two hours, mix the pepper,onion, ginger and curry leaves to the batter and beat well again.  If you are not using immediately, keep it in the refrigerator and take it out 1/2 an hour before using it.

To make the vadai:
Heat the oil for deep frying in a heavy bottom kadai.  Wet your palms in water,  take a small amount of batter, roll it out like a ball and place it in your palm. Dip your finger in water and make a small hole in the middle.  Gently drop it in the hot oil.  You'll notice oil bubbling around the edges of the vadai. ( Keep the flame in medium to low if the oil is too hot.  If the oil is too hot, it might quickly become brown in the outside and remains uncooked in the inside). After a minute turn the vada to the other side.  Once the bubbling of oil slows down or stop, take it out.  Serve immediately with Coconut chutney.

Note:
Incase if you are having heartburns during pregnancy, avoid this.  Instead you can have it after delivery, since it strenghtens the back bones.

Linking this post with Indian Food Palooza, Only South Indian, Evening Snacks Recipes, Healthy Morsels- Pregnancy, I'm the star, Bon Vivant- Savoury Items, Hot and Spicy Treat- Festive FoodComfort Food.

reade more... Résuméabuiyad

Jil Jil Jigarthanda

Jil Jil Jigarthanda is a cool drink,known to be originated from Madurai, Tamil Nadu state of India.  Although this is a popular drink in Madurai,  this can be found allover Tamil Nadu. I have also come across different flavours in different places.  Some have a malai taste along with jelly and ice cream.  The common one must be with rose flavour,badam pisin  and ice cream.


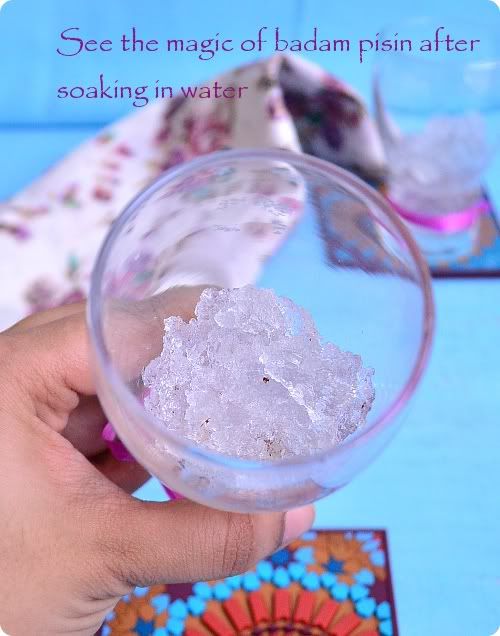
Badam pisin is a type of edible gum which looks like a little stone or rock.  This is known to be a natural coolant for our body.  This is consumed a lot during summer here in India.  Badam pisin, the jelly like substace is generally used along with Nannari sherbet,jigarthanda or any other cool drink.

Ingredients:
Milk-1/2 litre
Sugar- 3 tbsp
Rose syrup- 3 to 4 drops
Badam pisin- 3 to 4 pieces
Ice cream- 4 scoops( vanilla or kulfi flavours)

Method:

Soak the badam pisin in a glass of water for overnight.  Badam pisin absorbs all the water and it looks like a jelly .  |Add some  more water to it and leave it in the refrigerator until you use it.
Now boil the milk along with 1/4 litre water, continue boiling it until reduces to half.  Take off from heat.  Let it cool down completely.  Add rose syrup and sugar,mix it well until the sugar dissolves completely. Refrigerate for minimum of 4 to 5 hours before serving.  Just before serving, take a tall glass, add a spoonful of badampisin in the bottom, pour the rosemilk,stir well and top it up with the ice cream.

Note:
Increase or decrease the amount of sugar according to your taste.  Please don't add the badam pisin along with the milk and store it in the refrigerator, badam pisin will absorb all the liquid.
reade more... Résuméabuiyad

Gujias With Paneer and Coconut filling

It's been so colourful this week everywhere, not just in India and in our great blogosphere too.  Oh! Yeah, everybody around here is celebrating Holi,  I don't know much about this festival and we don't celebrate it either, but I don't think there is nothing wrong in getting tempted by the sweets which are specially made for Holi. Although being a food blogger is a real pleasure, sometimes I feel like we do have a few disadvantages, like started craving and tempted by the foods which we see in other blogs  or may be it's just me :( 


Anyway, this whole week I have been tempted by these yummy sweets and drinks like gujias and thandai.  I satisfied my craving for thandai by having some store bought Badam milk, so I need some gujias now.   Gujias are a traditional Indian sweet, it has a wrapper made out of flour and filled with khoya , dry fruits and coconut.  We, in South India, particularly in places like Nagercoil, they make a sweet very similar to this, filled with only sweetened coconuts, which is known as Poorians, funny name, huh!
Me and my husband enjoy this sweet with just coconut filling, today I have added some paneer too, which was really yummy! Enjoy making this simple sweet with your favourite filling.

Preparation Time:30 minutes
Cooking Time: 30 minutes
Makes about 20

Ingredients:
For the pastry cover:
Plain flour- 200 g
Ghee- 1 tbsp ( melted )
Salt- 1/2 tsp
Bicarbonate of soda- a pinch
Water to knead the dough

For the filling:
Paneer- 100 g
Fresh grated coconut- 4 tbsp
Sugar- 50 g
Saffron- few strands soaked in warm milk
Cardamom powder- 1/2 tsp
Almonds and pistachios- 1 tbsp (roughly chopped)

For the paste:( mix it together to make as a paste )
Plain flour- 1 tbsp
Water- 1/2 tbsp

Oil for deep frying.

Method:
Mix the flour, salt and bicarbonate of soda in bowl.  Add the melted ghee and mix well to incorporate into the dough. Now add enough water and make it into a smooth and pliable dough.  Cover the dough and let it rest for 15 minutes.

Prepare the filling:

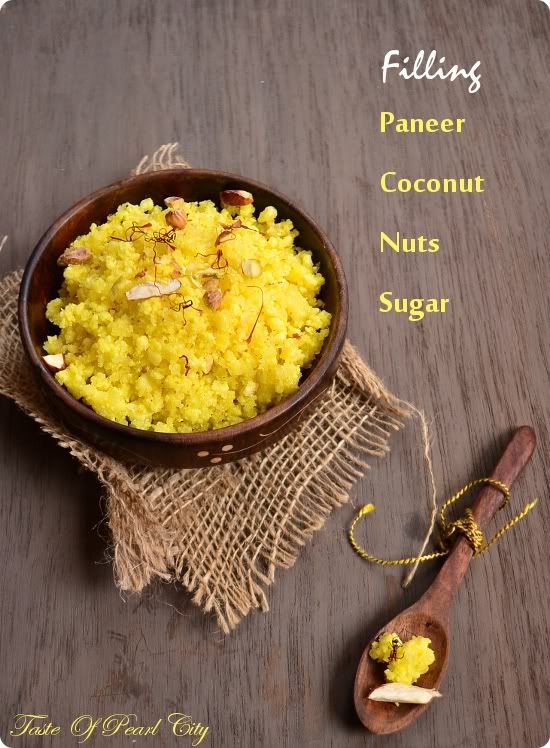
Crumble the paneer and mix it with sugar, coconut and saffron milk.  Start heating this mixture in a stove top in medium heat, keep stirring continuously without sticking to the bottom of the pan.  After sometime you can notice that the mixture has started releasing some liquid.  Keep stirring continuously until the mixture looks dry.  Finally add the cardamom powder and chopped nuts, mix it well.

Prepare the gujias:

Divide the dough into 15 to 20 equal rounds.  Roll out each into a 5 to 6 cm diameter circle.  Place a small amount of filling in the middle.  Apply the paste around the edges, make it into a semi circle and seal the edges.


Heat oil in a kadai, when the oil gets heated.  Reduce the temperature to medium to low, add 2 to 3 gujias at a time and fry it on both sides until it looks golden brown in colour.
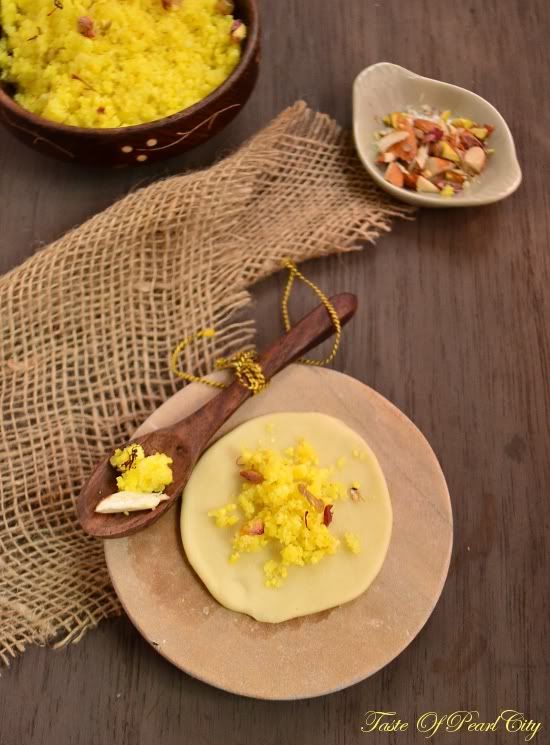
Serve it while they are still warm or let it cool down completely and store it in an air tight container.  Since we have added paneer and coconut, it's better to finish it off in a day or two.
 
reade more... Résuméabuiyad

Black eye peas gravy

I might have over 400 recipes in my blog, but still I have the question of what to cook today almost everyday. There might be a millions of recipes passing through our mind from television shows, Internet or book,  the questions is about ,do I have these ingredients in my pantry,will this recipe suit my family and above all is it easy to cook and how much time does it take.  It's not possible to spend hours and hours in the kitchen everyday.  On special occasions we might cook different recipes and lots of varieties to please our family, but on daily basis, I'm sure everybody will be looking for something easy to cook and less time consuming.


This is one such gravy or curry which can be cooked  in minutes.  Also if you prepare the base of the curry and store it in a refrigerator, you can use different beans,potatoes or mixed vegetables or even chicken or meat  with the same base.  Imagine you have the base of the gravy stored in the refrigerator, you wake up late in the morning and got 15 minutes to prepare your lunch box.  Take out this curry base, heat it up for 5 minutes, then add canned beans or cooked beans to the gravy,let it simmer for another 5 minutes.  Your quick curry is ready under 10 minutes,  now you have 5 more minutes to spare for other work.  That sounds good isn't ?

Coming to the recipe, as I already said different pulses,mixed vegetables or potatoes can be added to this gravy.  I prefer adding pulses and today's pulse is Black eye peas. Black eye peas are high in fibre. Since you get the best from the dried ones, I would prefer using the dried one rather than the canned ones.  It's also rich in potassium and iron.  These pulses are also a rich source of protein.  Particularly if you are following a vegetarian diet, it's good to include these pulses in the regular diet to keep up the protein level. Read more about black eye peas from here.  Let's see how to make this simple and easy gravy.

Preparation Time: 10 minutes
Cooking Time: 30 minutes
Serves 2

Ingredients:
Dried black eye peas- 100 g
Onion- 1 large (roughly blended)
Tomato- 1 medium sized ( pureed)
Ginger garlic paste- 1 tsp
Chilly powder-1/2 tsp
Coriander powder- 1 tsp
Curry powder or Channa masala powder-1 tsp
Garam masala- 1/4 tsp
Cinnamon- 1/4 inch stick
Cumin seeds-1/2 tsp
Coriander leaves- 1 tbsp ( finely chopped )
Lemon juice- juice of 1/2 a lemon
Oil- 1 tbsp
Salt to taste

Method:
Soak the dried black eye peas overnight or minimum 3-4 hours.  Pressure cook the soaked peas for upto 1 whistle.  Coarsely blend the onions in a blender and keep it separately.  Heat oil in a heavy bottomed pan,  add cumin and cinnamon.  Add ginger garlic paste and coarsely ground  onions and saute well.  Once the raw smell goes and slightly brown in colour , add the pureed tomato.  Mix well and stir until you see oil on the sides. At this stage add all the spice powders and mix well.  Cover the pan and cook until oil floats on top.
If you would like to store in a refrigerator,  at this stage take it off from heat,  add the lemon juice, allow it to cool down completely and store it in a glass jar.  This can be kept upto a week in the refrigerator.
To continue with the recipe,  add the cooked peas,stir well.  Cover the pan and let it simmer for 10 minutes. Add salt to taste, chopped coriander and finally lemon juice.  Stir well and take it off from heat.  Serve it warm with breads, roti's or rice.
reade more... Résuméabuiyad

Palak Paneer

Spinach is one of those super vegetable which has to be included in our everyday diet.  We know that spinach is a rich source of iron,apart from that spinach is also rich in Vitamin C, Vitamin K, magnesium etc.  Including a good amount of spinach in your everyday diet, helps you prevent against certain type of cancer.  It helps builds up your immunity system, Vitamin K - strengthens your bones.  The high amount of Vitamin A- keeps your skin glowing.  When this super vegetable has so much to offer for our body, why don't we include this in our diet and keep our body active and healthy.

Whatever recipe you prepare,remember to boil the spinach in water for few minutes to remove certain types of acid in the leaves.  Don't drink or use the boiled water as stock, since the acids are not good for your health.  If you would like to know more about this super vegetable, read it from here, here and here.
When it comes to spinach, I always feel comfortable with dhal and that's the most comfort food of all for me.  Recently my daughters have developed a phobia that no more dhals.  When I enter into my kitchen to prepare lunch, my little one comes running at the back of me and she says, amma, no dhal today.  So the alternative for spinach would be with paneer,aloo or mutton.  In my home when it's mutton they enjoy the food a lot, for a veggie alternative we like it with paneer and aloo.  I almost use the same preparation method for mutton and paneer but still there is a huge difference in flavours.  When you have fresh paneer and fresh palak, it tastes the best.  This can be enjoyed as a side with roti's,naan or kulchas.

Preparation Time: 10 minutes
Cooking Time:20- 30 minutes
Serves 4

Ingredients:
Spinach- 1/2 kg
Paneer- 200 g ( thinly sliced into squares or rectangle)
Onion- 1 big sized ( finely chopped )
Tomato- 2 medium sized ( finely chopped)
Ginger garlic paste- 2 tsp
Cinnamon- 1/2inch stick
Bay leaves- 1
Cumin seeds- 1/2 tsp
Chilly powder- 1/2 tsp
Coriander powder-1 tsp
Curry powder- 1 tsp
Green chilly- 1
Kasuri methi- 1 tsp crushed
Oil- 1 tbsp
Salt to taste

Method:
Wash the spinach in water for 3 to 4 times to remove all the dirt.  Add the spinach to the boiling water and leave it for 3 to 4 minutes.  Drain all the water and blend it in a blender,keep  it separately.
Heat oil in a thick bottomed vessel.  Add bay leaf, cinnamon and cumin.  Now add the ginger garlic paste and chopped onion.  Saute until the raw smell goes, this may roughly take about 5 minutes.  Then add the tomatoes, mix it well.  Keep the flame in medium,cover the pan and let it cook until the tomatoes look mushed up.  At this point add chilly powder,coriander powder,curry powder,green chilly and kasuri methi.  Give it a good stir, keep the flame in low,cover the pan and cook until oil separates.
Finally add the pureed spinach, paneer and salt.  Let it simmer for 3 to 4 minutes.  Switch off the flame and serve it warm with roti's and naan.

This recipe goes to  Healthy Morsels- Pregnancy , Let's Cook- Greens, Green Blog Hop

reade more... Résuméabuiyad

Paneer Mutter Masala

Paneer Mutter Masala is again something very special which we would like to order in a restaurant.  Every home cook will have their own version for this gravy with few minor changes.  When it comes to these restaurant special gravies like Butter Chicken, Paneer Makhani etc.
There is always one recipe which I totally depend on is,Varevah.  Almost everybody who watched  his video recipes will definitely start following his recipes.  His videos are always simple and easy to follow and interesting to watch too.  Needless to say his recipe never fails, no wonder he has got so many fans.

Whenever I had these gravies like paneer makhani or paneer mutter masala, I never thought it would be so easy for me to make at home.  Sometimes it makes you feel really good when you are able to recreate this restaurant menu at home.  With big thanks to Varevah for sharing this recipe, let's see how to make it.

Preparation Time:10 minutes
Cooking Time: 40 minutes
Serves 4

Ingredients:
Paneer- 100 gms ( diced in cubes )
Peas- 200 gms ( boiled )
Onion- 1 big sized chopped finely
Tomato- 2 medium sized chopped finely
Ginger garlic paste-1 tsp
Chilly powder- 1 tsp
Coriander powder- 2 tsp
Garam masala- 1/2 tsp
Kasoori methi-1 tsp
Cashew nut-4 nuts
Ketchup- 2 tsp
Cumin seeds-1 tsp
Cinnamonstick- 1/2 inch stick
Oil- 1 tbsp
Salt to taste
Cream-2 tsp ( optional )

Method:
Boil the peas and keep it separately.  Heat oil in a pan, add cumin seeds and cinnamon stick.  After a minute,add ginger garlic paste, keep the heat in medium and stir well.  Now add the cashews and onions , stir well until they looks transparent.  To get the onions cooked quickly, you can add a little bit of salt. Now add the tomatoes and stir well.  Cover the pan and cook till the tomatoes get soft and mushy.  Now add kasurimethi,chilly powder and coriander powder to it.  Add some water , cover the pan and cook till it looks like gravy.  After few minutes,switch of the stove.  Blend the mixture in a blender until  it's pureed well.  Pour the ground mixture again in a pan and start cooking it in medium heat.  Now add the ketchup and salt to taste.  Add the diced paneer and cooked peas.  Cover the pan and let  it cook for a minute or two.  Finally add the garam masala and stir well.  Just before serving, you can drizzle some cream on top or just serve it without cream with naan or roti's.

Linking this recipe with Comfort Food 


reade more... Résuméabuiyad