Pages

.

Showing posts with label Dessert. Show all posts

Single Serving Brownie in a Cup

Just in time for Friday…

This is a perfect dessert for those of us who love dessert, but love it so much that making an entire pan would be a bad idea. 

Why you ask?

Because in two days, the whole 9x13 pan of brownies will be consumed. 
That’s not so bad if you have a family of 6-7, but for a family of 2, well, that’s trouble. 

Since I still love my desserts – my sister and I decided to try a brownie in a cup. 

We decided it was perfect: just the right amount of work that you won’t make it every day, and just the right amount of rich, gooey chocolate to meet your craving. 

Single Serving Brownie in a Cup

Ingredients

  • 2 T white whole wheat flour
  • 1 T sugar (slightly heaping) 
  • 1 T dark chocolate cocoa powder
  • 1/4 tsp. baking powder
  • pinch of salt
  • 2 T water
  • 1 tsp. olive oil
  • splash of vanilla
  • 1 T dark chocolate chips

Directions

Combine the 2 T flour with 1 heaping T sugar, 1 T cocoa powder 1/4 tsp. baking powder and a pinch of salt in a small mug, cup or bowl.  We used a 1 C serving bowl and it fit perfectly. 

Add in 1 1/2 T water, 1 tsp. olive oil and a splash of vanilla.  Stir until well mixed.  Don’t forget the the dark chocolate chips!

Microwave on high for 30 seconds, adding an additional 15-30 seconds if needed.

Top with ice cream and serve.

Use caution when eating – the contents are really hot! 

reade more... Résuméabuiyad

German Apple Cake

If you are looking for a delicious and quick apple dish, go with this German Apple Cake recipe from What Megan’s Making.  I can always count on Megan’s recipes to be tasty and easy, and this one was no exception. 

In fact, I made this cake when we had some new friends over for games.  We enjoyed it so much before I knew it, we had just one piece left and I realized I hadn’t taken any photos of the cake sliced and served.


Guess that’s a sign of a good recipe, right? 

German Apple Cake – Adapted from What Megan’s Making

Ingredients

  • 2 medium apples
  • 3/4 C sugar
  • 1/4 C olive oil
  • 1/4 C applesauce
  • 1 egg
  • splash of vanilla
  • 1 C white whole wheat flour
  • 1/8 tsp. salt
  • 1 tsp. cinnamon
  • pinch of nutmeg (optional)

Directions

Mix together 3/4 C sugar, 1/4 C olive oil, 1/4 C applesauce, 1 egg and a splash of vanilla in a large bowl.  Stir well. 

Mix together 1 C flour, 1/8 tsp. salt and 1 tsp. cinnamon.  Add a pinch of nutmeg, if desired.  Add to the wet ingredients and stir until incorporated. 

Peel, core and slice apples into 1/2-1 inch pieces. 

Stir in the apple pieces. 

Place into a lightly greased 9x9 or 8x8 (or 9-inch pie plate) glass baking dish. 

Bake at 350 for 40-50 minutes, until center is set and the edges are lightly browned. 

Serve warm, with ice cream, if desired. 

Enjoy!

reade more... Résuméabuiyad

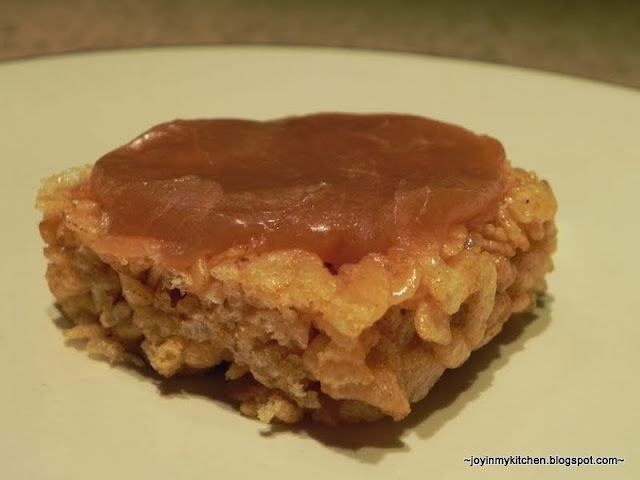
Pumpkin Spice Rice Krispie Bars with Caramel Topping

Looking for a quick and easy way to make Rice Krispie bars more fall like?  While we love our apple version, this pumpkin spice topped with caramel is delicious too!

Pumpkin Spice Rice Krisipie Bars with Caramel Topping

Ingredients

  • 2 T butter
  • 1 T sweet potato puree (or pumpkin)
  • 1 (10 oz) bag mini marshmallows
  • 1 tsp. cinnamon
  • 1/2 tsp. nutmeg
  • pinch of ginger
  • 6 C brown rice krispies
  • Your favorite caramels

Directions

Gather ingredients. 

Melt 2 T butter in a large pot, and then turn the heat to low.  Add in the marshmallows and heaping 1 T sweet potato or pumpkin puree.  Allow the marshmallows to cook on low, stirring frequently as the marshmallows melt.

Stir in the spices. 

Once the marshmallows are melted, pour in the 6 C brown rice krispies.  Working quickly, stir to combine and pour into a lightly greased 9x13 baking dish. 

For a thicker bar, you may want to choose a 9x9 baking dish.  Either way, spray your hand with olive oil and then press the bars into the pan. 

After 15 minutes, cut the bars into squares.  To serve, top each with a soft caramel.

To soften a caramel: unwrap and microwave for 10 seconds.  Alternatively, hold the wrapped caramel in your hand for a few minutes to let it soften.   Enjoy!

reade more... Résuméabuiyad

Cheesecake Stuffed Chocolate Chip Cookie Bars

I brought these cheesecake stuffed cookie bars to our neighbor’s this year for our annual spaghetti feed. 

They were a huge hit and we really enjoyed them. 

The original recipe called for a 9x9 baking dish, but having made them that way, I’d recommend an 11x7 baking dish.  The bars were quite thick, so I think baking them in the 11x7 pan will help. 

I used all whole wheat flour in this recipe, and it was delicious. 

Hope you enjoy them!

Cheesecake Stuffed Chocolate Chip Cookie Bars – Adapted from Mel’s Kitchen Café

Ingredients

  • 6 T butter, melted and cooled
  • 1/2 C brown sugar
  • 1/8 C sugar
  • 1 egg
  • 1 tsp. vanilla
  • 1 C white whole wheat flour
  • 1/4 tsp. baking soda
  • 1/8 tsp. salt
  • 3/4 C dark chocolate chips
  • 6 oz. cream cheese, Neufchatel preferred
  • 1/4 C powdered sugar
  • 1 egg white
  • splash of vanilla

Directions

Melt and cool 6 T butter.  Mix in 1/2 C brown sugar and 1/8 C sugar.  Then, mix in 1 egg and 1 tsp. vanilla. 

Sift together 1 C white whole wheat flour, 1/4 tsp. baking soda and 1/8 tsp. salt.  Add to the sugar mixture, mixing until just combined. 

Stir in chocolate chips. 

Arrange just over half of the cookie dough in the bottom of an 11x7 cake pan, lightly greased and/or lined with tinfoil.  Note: I used a 9x9 baking dish, and you can also do that but your bars will be very thick and you won’t get as much cheesecake in each bite.

Then, whip the 6oz. of cream cheese with 1/4 C powdered sugar.  Whip in the egg and a splash of vanilla and beat for 3 minutes until fluffy. 

Pour the cream cheese mixture over the top of the cookie crust. 

By the tablespoon, flatten the dough into a small circle.  Arrange these small dough circles over the top of your filling layer. 

Bake at 350 for 35-40 minutes.  Check that the edges are lightly browned.  Cool on a cooling rack.  When completely cooled, transfer the pan, covered, in the refrigerator. 

Cut into bars. 

Serve & enjoy. 

Store remaining bars in the refrigerator. 

reade more... Résuméabuiyad

Fruit & Yogurt Wraps

A tasty and refreshing breakfast or after school treat. 

Tortillas stuffed with yogurt, honey and fruit.  Rolled in cinnamon and sugar. 

Yum!

Fruit & Yogurt Wraps – Adapted from Tidy Mom

Ingredients

  • 4 fajita-sized tortillas
  • 1/2 T butter, melted
  • 3 T sugar
  • 1/2 tsp. cinnamon
  • 1 C plain Greek Yogurt (or your favorite yogurt variety)
  • 4 tsp. honey
  • 1 C frozen fruit or 1/4 C your favorite fruit preserve

Directions

Begin by melting 1/2 T butter and using a pastry brush to coat one side of each fajita.  Place the fajitas butter-side down one at a time onto a plate where 3 T sugar have been mixed with 1/2 tsp. cinnamon. 

Top each tortilla with 1/4 C yogurt, spreading it in the center, leaving about a 1-inch margin around the edge. 

Drizzle approximately 1 tsp. honey over the yogurt. 

Layer fruit or fruit preserve over the top. 

We enjoyed blueberry, raspberry frozen fruit tucked inside these, as well as a raspberry rhubarb preserve option.  Yum! 

Note: if you use a preserve, like the raspberry rhubarb pictured above, be sure to leave at least 1 inch along the margin and spread your filling thing; otherwise it will ooze out when you roll it up. 

Roll up the tortilla and place them onto a cookie sheet. 

Freeze for 20-30 minutes. 

Slice in half. 

Place into a freezer-friendly bag or container. 

To serve, thaw at room temperature for 25-30 minutes before enjoying.  Don’t let them sit out too long or they will get soggy.  We found about 25 minutes was perfect.  These can easily be taken out of the freezer when you get up in the morning and they’ll be ready by the time you make your way to the kitchen for breakfast! 

They also make a great afternoon snack. 

Enjoy!

reade more... Résuméabuiyad

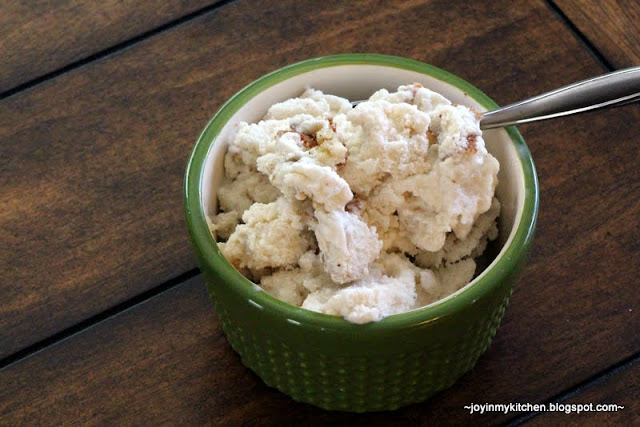
Mini Doughnut Ice Cream

The state fair is going on in our area right now – it’s extremely well attended, and it’s known for, well, being one of the best state fairs in the country. 

Of course, the food is a huge draw at the fair.  Unless you have food allergies.  Then, you recreate the food at home. 

New this year was a mini doughnut batter ice cream.  It sounded amazing.  Now, I have no idea how to make a mini doughnut batter, but I can make ice cream and doughnuts! 

So, to celebrate the last day of the fair, Labor Day, and the official end to summer, here’s a scoop of Mini Doughnut Ice Cream just for you.

Mini Doughnut Ice Cream  - Inspired by the State Fair

Ingredients

  • 1-2 cinnamon sugar doughnuts (I used this recipe base)
  • 1 1/2 tsp. cinnamon
  • 3/4 C sugar
  • 2 C whole milk
  • 1 C half and half
  • 1 C whipping cream

Directions

Begin by making (or purchasing) doughnuts.  We made our favorite buttermilk doughnuts and rather than glaze them we brushed melted butter on the doughnuts and rolled them in cinnamon sugar. 

Then, I took 1-2 doughnuts and broke them apart into small pieces.  I flash frozen these pieces by arranging them on a cookie sheet and placing them in the freezer for about 20 minutes. 

Meanwhile, mix together 3/4 C sugar with 2 C whole milk, 1 C half and half and 1 C whipping cream.  Sprinkle in the 1 1/2 tsp. cinnamon. 

Whisk all these ingredients together. 

Pour into the freezer bowl of your ice cream maker. 

Make according to your manufacturers directions. 

When the ice cream is ready, scoop into a large container and stir in the frozen doughnut bits. 

Cover and freeze for 3-4 hours and then serve.  Store leftovers in the freezer. 

Enjoy!

reade more... Résuméabuiyad