Pages

.

Showing posts with label Milk. Show all posts

Cream of Mushroom Soup

With Thanksgiving just around the corner, many recipes call for canned cream of mushroom soup. 

I recommend, making it yourself instead. 

It doesn’t take that long and the flavor – wow.  You won’t want to go back to the can. 

This has been our go-to recipe for years, and although I’ve shared it here before, I thought new readers, especially, might be interested in this recipe. 

Cream of Mushroom Soup – Finding Joy in My Kitchen

Ingredients

  • 4 oz mushrooms (fresh & sliced, or sliced from a can)
  • 1 T minced onion
  • 1/2 C chicken broth
  • 1/2 C milk
  • ~2 T corn starch
  • salt & pepper, to taste

Directions

Begin by preparing your mushrooms.  Wash, slice and place in a small saucepan, heating until liquids are evaporated.  If you are using canned mushrooms, skip that step and just drain the mushrooms and add them to a small saucepan. 

Meanwhile, mix together 1/2 C chicken broth with 1 1/2 T corn starch.  Stir well until corn starch is dissolved.  Add in milk and minced onions and mix well. 

Slowly, while stirring constantly, add the cornstarch mixture to your small saucepan.  Reduce heat to medium and stir constantly until the mixture begins to bubble (you may need to increase the heat a little bit) and thicken*.  Stir for 1-2 minutes and then remove from the heat.  Season with salt and pepper.

*Note: If your soup does not thicken to your liking, take the remaining 1/2 T corn starch and mix it with 1 T cold water.  Stir well, and slowly drizzle it into the soup mixture while it’s still on the burner.  Once again, stir constantly during this process, just like you would thickening gravy. Continue until the desired thickness is reached.


Store in the refrigerator for up to 1 week, or use right away. 

Enjoy!

Recipe makes roughly 8 oz. 

reade more... Résuméabuiyad

Mini Doughnut Ice Cream

The state fair is going on in our area right now – it’s extremely well attended, and it’s known for, well, being one of the best state fairs in the country. 

Of course, the food is a huge draw at the fair.  Unless you have food allergies.  Then, you recreate the food at home. 

New this year was a mini doughnut batter ice cream.  It sounded amazing.  Now, I have no idea how to make a mini doughnut batter, but I can make ice cream and doughnuts! 

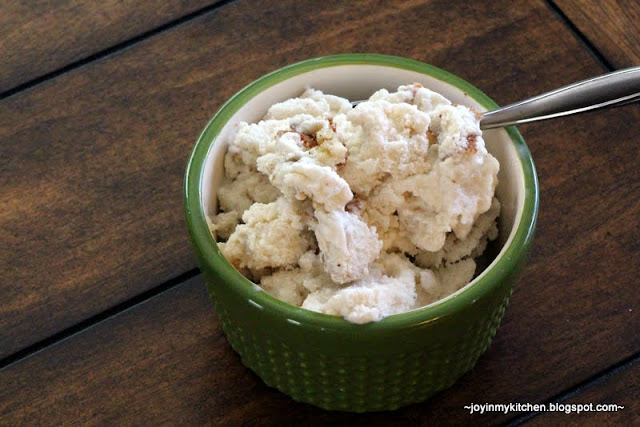
So, to celebrate the last day of the fair, Labor Day, and the official end to summer, here’s a scoop of Mini Doughnut Ice Cream just for you.

Mini Doughnut Ice Cream  - Inspired by the State Fair

Ingredients

  • 1-2 cinnamon sugar doughnuts (I used this recipe base)
  • 1 1/2 tsp. cinnamon
  • 3/4 C sugar
  • 2 C whole milk
  • 1 C half and half
  • 1 C whipping cream

Directions

Begin by making (or purchasing) doughnuts.  We made our favorite buttermilk doughnuts and rather than glaze them we brushed melted butter on the doughnuts and rolled them in cinnamon sugar. 

Then, I took 1-2 doughnuts and broke them apart into small pieces.  I flash frozen these pieces by arranging them on a cookie sheet and placing them in the freezer for about 20 minutes. 

Meanwhile, mix together 3/4 C sugar with 2 C whole milk, 1 C half and half and 1 C whipping cream.  Sprinkle in the 1 1/2 tsp. cinnamon. 

Whisk all these ingredients together. 

Pour into the freezer bowl of your ice cream maker. 

Make according to your manufacturers directions. 

When the ice cream is ready, scoop into a large container and stir in the frozen doughnut bits. 

Cover and freeze for 3-4 hours and then serve.  Store leftovers in the freezer. 

Enjoy!

reade more... Résuméabuiyad

Banana Blueberry Baked Oatmeal

This recipe is perfect for a back to school morning.  Make it the night before and either bake it then, or bake it in the morning.  Double the batch and you can freeze leftovers as a easy grab-and-go breakfast during the week. 

Loaded with wholesome oats and flavorful bananas and blueberries, you are sure to enjoy this version of one of our favorite breakfasts!

Banana Blueberry Baked Oatmeal

Ingredients

  • 1/2 C applesauce, unsweetened
  • 1/2 C brown sugar (no need to pack this one)
  • 1 egg
  • 3 C oats (quick or old fashioned, or a mix)
  • 2 tsp. baking powder
  • Pinch of salt
  • dash of cinnamon
  • 1 C milk (add 1/4 C milk if you make the night before)
  • Splash of vanilla
  • 1/2 C fresh or frozen blueberries
  • 1-2 medium bananas

Directions

In a large bowl combine 1/2 C applesauce, 1/2 C brown sugar and 1 egg.  Stir well.  Add in 3 C oats, 2 tsp. baking powder, a pinch of salt, a dash of cinnamon and 1 C milk.  If you are making this the night before and not baking it immediately, add an additional 1/4 C milk.  Stir in a splash of vanilla. 

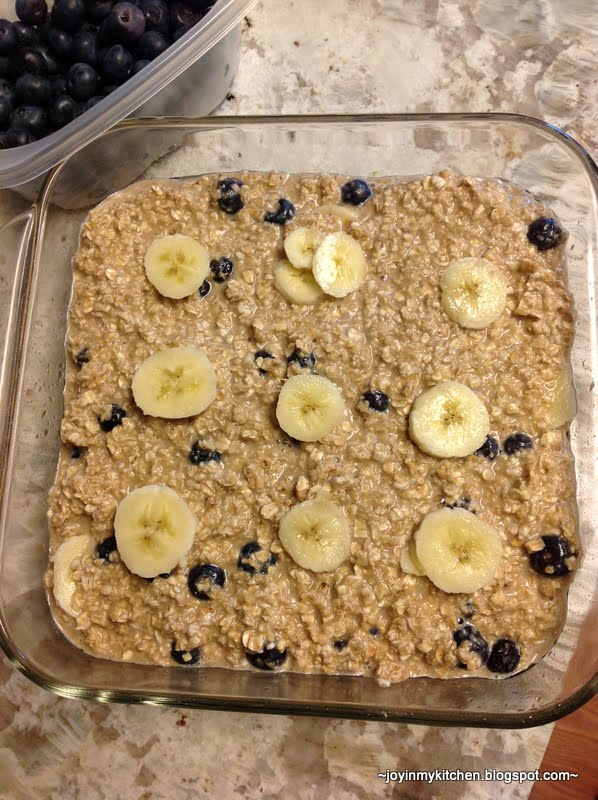
Carefully stir in the blueberries.  Then, slice up your banana(s) into thin slices. 

Lightly grease a 9x9 glass baking dish and arrange 1/3 of the banana slices on the bottom of the dish. Pour half of the oat mixture over the top.  Then arrange 1/3 of the slices of banana over the top of the oats.  Top with remaining oat mixture.  Arrange bananas over the top. 

If you are baking immediately, place the baked oatmeal in an over heated to 350 degrees F and bake for 35-40 minutes until the center is set.  If you are not baking right away, cover and refrigerate overnight until you are ready to bake.  Place the pan in a cold oven and then turn the temperature on to bake and bake at 350 for 35-40 minutes until warmed throughout and the center is set. 

Serve warm, sliced or in a bowl with milk. 

Enjoy!  

This would also make a great after school snack cake!

reade more... Résuméabuiyad

Fajita Pie with Tortilla Crust

For those of you long-time readers of Finding Joy in My Kitchen, this fajita pie recipe likely comes as a surprise.  We don’t eat a lot of Mexican-type foods here as Frog Prince is not a big fan of cilantro, salsa or black beans. 

But, all that aside, Frog Prince enjoyed this dinner quite a bit. 

In fact, he said I could make it again, even with the black beans! 

Even better - this dinner was so simple to put together and it was in the oven in less than 10 minutes! 

I need more go-to dinners like this one for nights that just don’t work out as planned.  Having this one on the list is a nice change from our traditional rice cooker mac and cheese, or quick spaghetti

Hope you find this dinner quick and enjoyable too. 

Fajita Pie with Tortilla Crust – Adapted from My Biscuits are Burning

Ingredients

  • 1 (10-inch) burrito sized tortilla; or 2-3 fajita sized tortillas
  • 1 medium bell pepper, orange, red or yellow
  • 1/2 medium green bell pepper
  • 1 T minced onion
  • 1 medium tomato
  • 1/2 C black beans
  • 1/2 tsp. paprika
  • 1/4 tsp. chili powder
  • 4 oz. cheddar cheese
  • 2 eggs
  • 3/4 C white whole wheat flour
  • 1 tsp. baking powder
  • 1 C milk
  • salt & pepper, to taste
  • 1/4 C finely chopped spinach

Directions

Begin by lining the bottom of a lightly-greased 9-inch pie plate with your tortilla(s).  If you have smaller sized tortillas, just use 2-3, torn in half to fill the bottom of the pie plate and slightly up the sides. 

Finely chop 1 medium bell pepper (colored), 1/2 medium green bell pepper, and 1 medium tomato. 

Toss with 1 T minced onion and some pepper. 

Add in 2 oz of cheddar cheese, shredded.  Stir well.

Spread the mixture on the bottom of the tortilla-covered pie plate. 

Arrange black beans over the top. 

Sprinkle with paprika and chili powder. 

In the same bowl, mix together 3/4 C white whole wheat flour with 1 tsp. baking powder.  Stir well.  Then, add in 1 C milk and 2 eggs.  Whisk well until blended.  Add salt and pepper, a few dashes of each. 

Add in finely chopped spinach. 

Carefully pour the milk mixture over the veggies in the pie plate. 

Top with remaining 2 oz of cheddar cheese, shredded. 

Bake at 450 for 25-27 minutes until center is set and cheese is browned. 

Allow the tortilla pie to sit for 5 minutes before serving. 

Serve with salsa, if desired. 

Enjoy!

reade more... Résuméabuiyad

Creamy Cauliflower Zucchini Rice

This creamy rice makes a fantastic side dish. 

Brown rice.  Creamy garlic cauliflower. Shredded zucchini.  Parmesan cheese. 

I can guarantee you’ll enjoy this one!

Creamy Cauliflower Zucchini Rice – Inspired by Lindsay at Pinch of Yum

Ingredients

  • 2 C brown rice, uncooked
  • 4 C chicken broth
  • 1 tsp. minced onion
  • 1 medium zucchini
  • 16 oz. fresh or frozen cauliflower
  • 1 tsp. minced garlic
  • splash of milk
  • 1/2 T butter
  • 1/4 C Parmesan cheese, plus additional for garnish
  • salt and pepper

Directions

Begin by combining 4 C chicken broth with 2 C brown rice in the base of your rice cooker.  Add in 1 tsp. minced onion.   Place the cauliflower in the steamer basket.  Cook the rice while steaming the veggies simultaneously, for about 20 minutes.  

Meanwhile, shred the zucchini. 

When the cauliflower is tender, transfer it to your blender.  I used our immersion blender, and pureed the cauliflower in two batches. 

Puree until smooth, adding a splash or two of milk, as needed.  Then, season with salt and pepper.   

In a large saucepan, melt 1/2 T butter.  Add in minced garlic and sauté until the garlic smells amazing. 

Add in the zucchini, and sauté for 3-4 minutes until the zucchini is softened. 

Add the pureed cauliflower to the zucchini garlic mixture. 

Then, stir in the cooked rice. 

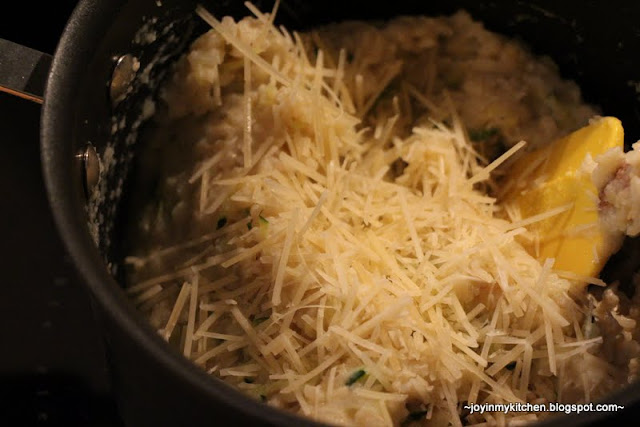
Add in some milk to achieve your desired creaminess.  Then stir in 1/4 C Parmesan cheese. 

Garnish with extra Parmesan cheese. 

Serve warm. 

Enjoy!

reade more... Résuméabuiyad

No-Bake Mixed Berry Cheesecake

This cheesecake would be a fun and wonderful dessert for your family this Valentine’s Day.  It’s easy to make (don’t let the ingredient list fool you) and tastes incredible. 

If you’d prefer, use cherries for the sauce, or perhaps just raspberries.  We really enjoyed the mixed berry approach, but the topping preference is flexible.  The cinnamon in the crust adds a depth of flavor that really set this dessert over the top. 

Elegant, yet simple. 

That’s a win in my book!

No-Bake Mixed Berry Cheesecake – Adapted from Cooking Classy

Ingredients

  • Base
    • 1 package graham crackers, crushed
    • 3 T butter
    • 2 pinches of cinnamon
  • Filling
    • 8 oz. Neufchatel cream cheese, softened
    • 2/3 C powdered sugar
    • 2/3 C whipping cream
    • 1 tsp. vanilla extract
    • 1/2 tsp. corn starch
  • Berry Topping
    • 2 C frozen mixed berries (raspberries, blackberries & blueberries)
    • 1 T sugar or honey
    • 1 T corn starch
    • 1/3 C cold water
    • 1/2 tsp. lemon juice

Directions

*Note: this dessert is best assembled right before eating, and the whipped topping keeps in the refrigerator for 1-2 days, so keep that in mind before making up the dessert. 

Combine the graham cracker crumbs with 2 pinches of cinnamon. 

Melt 3 T of butter in a small saucepan over medium heat, stirring occasionally.  Toss in the graham cracker crumbs and stir until coated.  Remove from heat and set aside. When cool, store in an airtight container until ready to assemble.  

To prepare the berries, combine 1 T sugar and 1 T corn starch in the bottom of a small saucepan and mix well. 

Slowly add in 1/3 C cold water, stirring as you add in the water to avoid clumps with the corn starch.  Add in 1/2 tsp. lemon juice. 

Pour in the frozen berries and place the pan on the stovetop over medium heat.  Stir almost constantly until the mixture comes to a slow boil. 

Reduce the heat to simmer and stir frequently while letting the berries simmer for about 5 minutes.  Then, remove from the heat. 

Using a strainer that has thin mesh, carefully pour small amounts of the berry mixture into the strainer.  Using a spoon, squish the berries around until the berry pulp remains in the strainer and all the good syrup runs through.  Repeat until you have removed all the seeds from the sauce. 

Cover and store the berry sauce in the refrigerator until you are ready to assemble the dessert. 

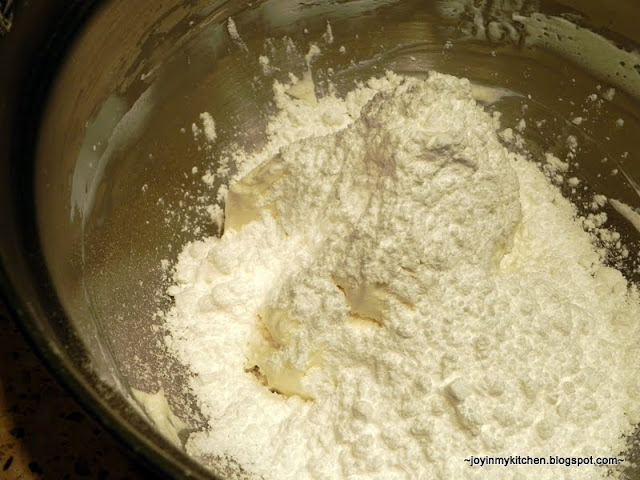
Finally, prepare the cream cheese filling.  In a medium bowl, whip the cream cheese with an electric hand mixer for 3 minutes until smooth and well whipped.  Add in 2/3 C powdered sugar and 1 tsp. vanilla. 

Whip again until smooth.  Scoop the cream cheese mixture out into a container that you will store the cream cheese filling into.  Then, in the same bowl add 2/3 C whipping cream.  Using your mixer, whip the cream until stiff peaks form.  Then, add in 1/2 tsp. corn syrup (this will help the whipping cream keep its form).  Whip again. 

Carefully fold the whipped cream into the cream cheese mixture.  Store in the refrigerator in an airtight container until you are ready to serve. 

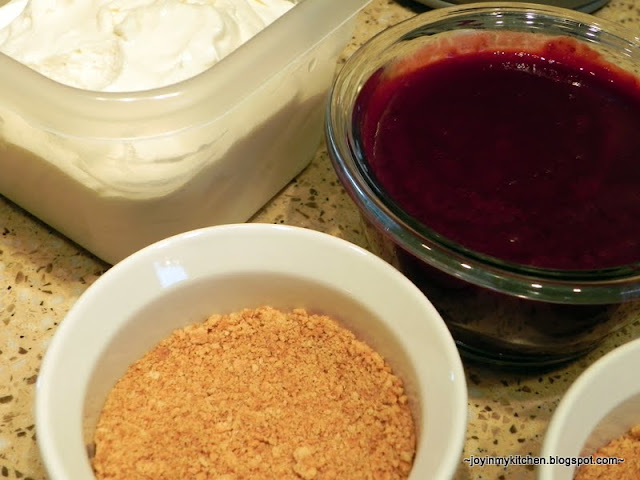
To assemble, gather up 6-8 small serving glasses or bowls.  Place 3-4 T crushed graham crackers in the bottom of the dish and lightly press with the back of the table spoon. 

Scoop 1-2 T of cream cheese filling over the top. 

Drizzle over 3-4 T of the berry sauce over the cream cheese filling. 

Serve chilled. 

Enjoy!

reade more... Résuméabuiyad